 Fly Tying Inventory
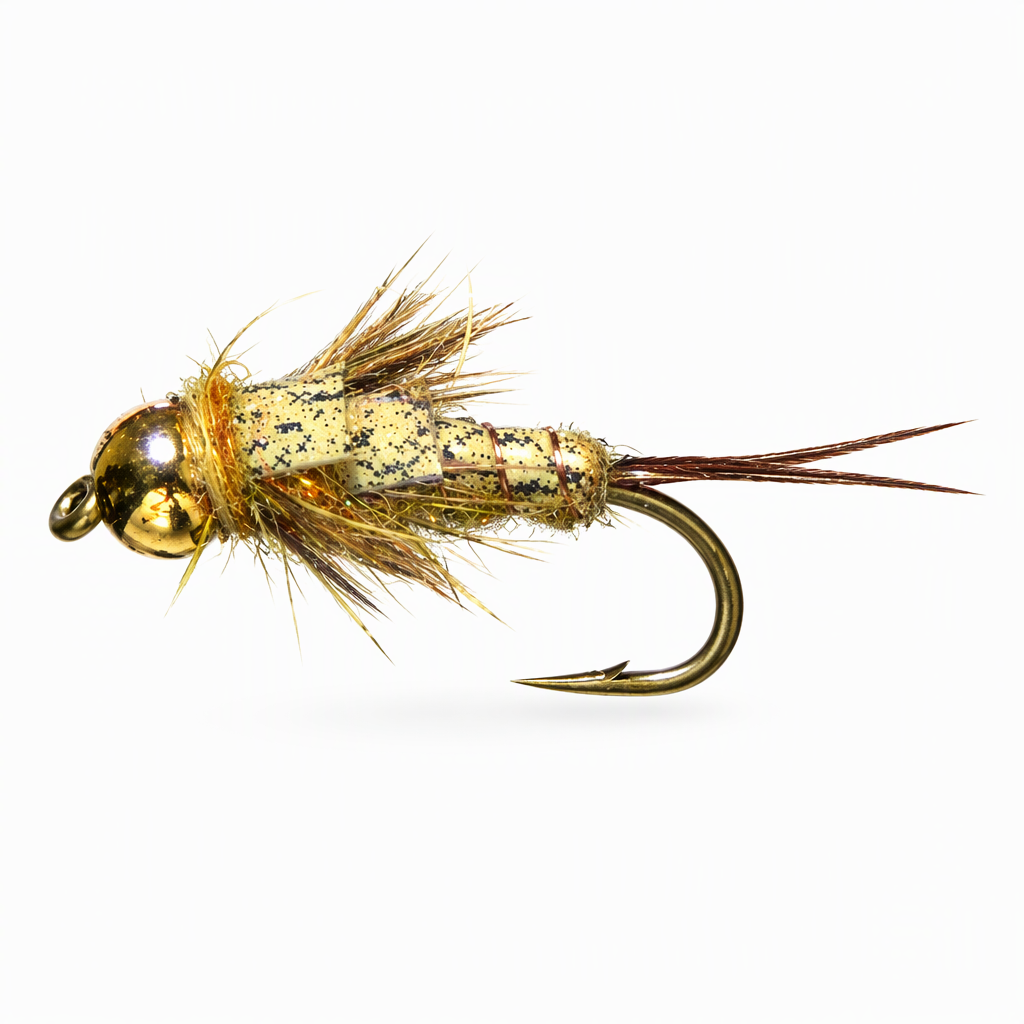
Barr's Tungstone
John Barr's Tungstone is a bead-head golden stonefly nymph. A gold tungsten bead gets it down, split biot tails and a mottled skin back give it a segmented stonefly look, and two rounds of hen back legs and wing pads build up the thorax. The abdomen is golden stone SLF dubbing ribbed with fine copper wire under a strip of Fino Skin. It is a compact pattern that suits sizes 10 to 18 on a 2X-long nymph hook.
Ready to tie this?
This pattern needs 8 materials. Sign up free to check which ones you already own.
Materials
Gold tungsten bead sized to the hook
Gold
Brown goose biots, one per side (or turkey biots)
Brown
Hareline Fino Skin strip for the back and wing pads (or mottled Thin Skin)
Copper wire, small
Copper · Small
Natural India hen back feathers, two used
Natural
How to Tie the Barr's Tungstone
- 1
Step 1
Slide the gold tungsten bead onto the hook and start the cream thread behind it. Wrap a thread base back to the bend.
- 2
Step 2
Tie in a brown goose biot on each side at the bend so the two tails splay apart. Bind the butts along the shank and trim the excess.
- 3
Step 3
Tie in a strip of Fino Skin and a length of small copper wire at the bend, leaving both trailing behind the hook.
- 4
Step 4
Dub the golden stone SLF onto the thread and build a tapered abdomen over the rear of the shank.
- 5
Step 5
Pull the skin forward over the top of the abdomen and tie it down. Rib the wire forward through the skin and dubbing in open turns, then tie it off and trim it.
- 6
Step 6
Fold the skin back toward the bend so it is out of the way. Tie in a hen back feather flat on top so its fibers sweep back along the sides as the first set of legs.
- 7
Step 7
Dub a short section of thorax, then pull the skin forward over it and the legs and tie it down to form the first wing pad. Fold the skin back again.
- 8
Step 8
Tie in a second hen back feather the same way for the front legs, then dub the rest of the thorax up to the bead.
- 9
Step 9
Pull the skin forward over the front of the thorax to form the final wing case, tie it down behind the bead and trim the excess.
- 10
Step 10
Whip finish behind the bead and trim the thread.
Watch Tying Tutorial
https://www.youtube.com/watch?v=KSJ2Ntq57lQ
Credit: InTheRiffle