 Fly Tying Inventory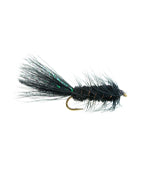
Bead Head Woolly Bugger
The most versatile stillwater streamer pattern ever created. A weighted bead head version of the classic Woolly Bugger with marabou tail, chenille body, and palmered hackle. It imitates leeches, baitfish, damselfly nymphs, and virtually anything else a trout might eat in a lake.
🪶 Ready to tie this?
This pattern needs 9 materials. Sign up free to check which ones you already own.
Materials
3XL or 4XL streamer hook, sizes 4-12 (size 6-10 preferred for stillwater)
Brass or tungsten bead, 3/16" or 5/32", black, gold, or copper
6/0 or 140 Denier, black (or match body color)
Lead or lead-free wire .020" (optional, for extra sink)
Marabou, black (also olive, brown, or white)
Flashabou or Krystal Flash, 2-4 strands, pearl or gold
Medium chenille, black (also olive, brown)
Saddle hackle, black or grizzly, palmered
Small copper or gold wire for durability (optional)
How to Tie the Bead Head Woolly Bugger
- 1
Step 1
Slide the bead onto the hook, small hole first, up against the eye. Secure hook in vise.
- 2
Step 2
Optionally wrap .020" lead wire behind the bead for added sink. Push wraps into the back of the bead.
- 3
Step 3
Start thread just behind the bead, covering lead wraps to create a smooth base.
- 4
Step 4
Measure marabou tail to about shank length and tie in at the bend. Trim excess. Add 2-4 strands of Flashabou on each side of the tail.
- 5
Step 5
Tie in optional ribbing wire along the body, starting at the bend.
- 6
Step 6
Tie in chenille at the same point as the tail.
- 7
Step 7
Select a saddle hackle with fibers about hook-gap length. Tie in by the butt at the base of the tail.
- 8
Step 8
Advance thread forward to the bead. Wind chenille up the shank in even turns to the bead. Tie off and trim.
- 9
Step 9
Palmer the hackle forward in open, evenly spaced turns over the chenille body. Secure at the bead.
Stroke hackle fibers rearward as you wrap for a clean palmer.
- 10
Step 10
Counter-wrap ribbing wire forward through hackle and chenille. Tie off at bead.
- 11
Step 11
Build a neat thread collar behind the bead. Whip finish and add head cement.
Watch Tying Tutorial
https://www.youtube.com/watch?v=QxnZid17QTw
Credit: Russell Blessing (original) / Orvis