 Fly Tying Inventory
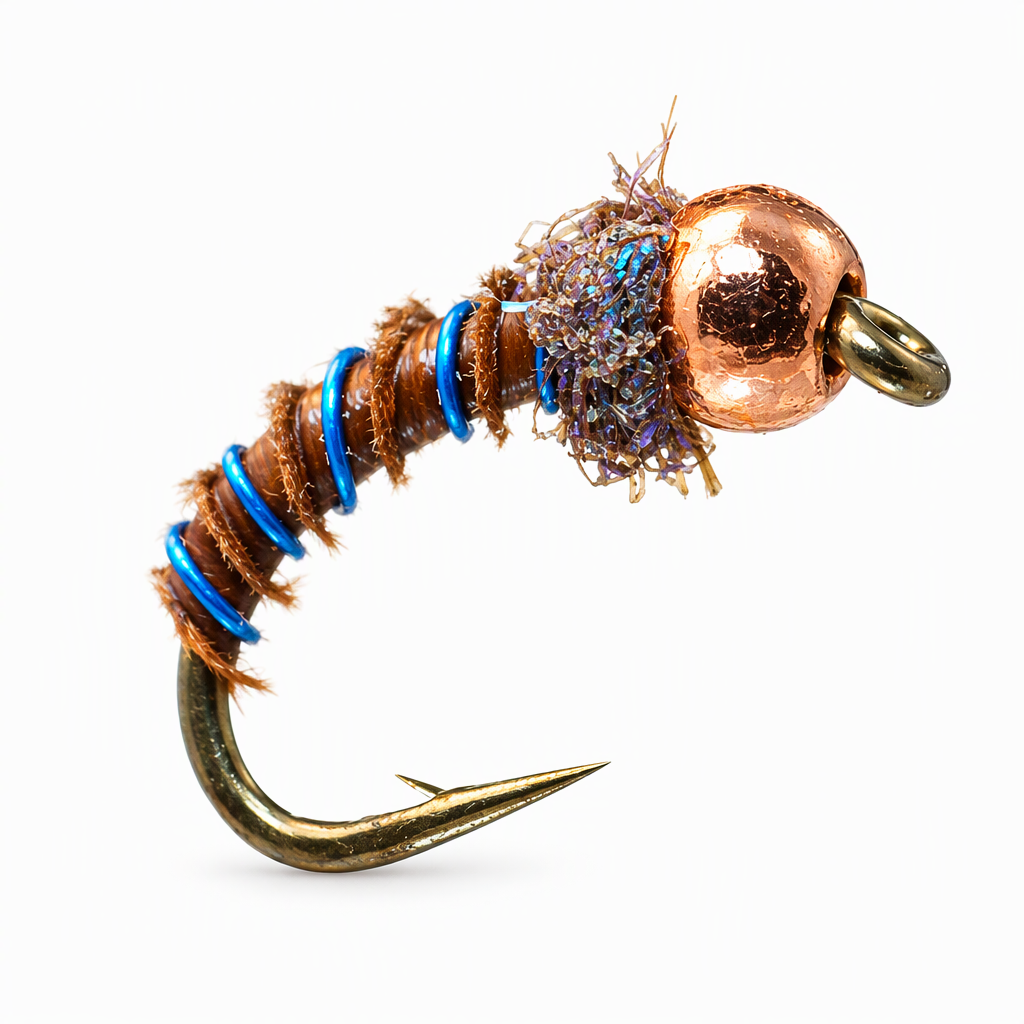
Biot Midge Pupa
Cheech's Biot Midge Pupa is a change of pace from the usual Zebra Midge. This brown and blue version pairs a goose biot body with a blue wire rib, an Ice Dub thorax and a copper tungsten bead, and it has done well where midging fish are selective. An olive and copper version worked under a big foam fly on cutthroat water. Hang it as a dropper or nymph it on the bottom. Many color combinations are possible. Tied here on a size 18 hook.
Ready to tie this?
This pattern needs 7 materials. Sign up free to check which ones you already own.
Materials
Firehole Stones Plated Tungsten Beads, copper, 2.0mm (5/64 inch)
Copper · 2.0mm
Nature's Spirit Stripped Goose Biots, brown
Brown
How to Tie the Biot Midge Pupa
- 1
Step 1
Slide the bead onto the hook, seat it at the eye and clamp the hook in the vise.
- 2
Step 2
Start the thread behind the bead, trim the tag and wrap a smooth base down the shank and into the bend.
- 3
Step 3
Pull a brown biot from the stem.
- 4
Step 4
Tie in the biot by its tip at the rear of the thread base, with the long end trailing off the back.
- 5
Step 5
Tie in the blue wire along the shank so it trails off the rear with the biot.
- 6
Step 6
Wrap the thread forward to a little behind the bead, leaving room for the thorax.
- 7
Step 7
Wrap the biot forward up the body in smooth, touching turns. Tie it off at the thread and trim the butt.
- 8
Step 8
Spiral the wire forward over the biot to make the rib. Tie it off at the front of the body and remove the tag.
- 9
Step 9
Dub the thread with a small pinch of Ice Dub and wrap a short thorax up to the bead.
- 10
Step 10
Whip finish behind the bead and trim the thread.
- 11
Step 11
Touch a small drop of water-based head cement to the wraps behind the bead.
Watch Tying Tutorial
https://www.youtube.com/watch?v=MK5o18e0KOQ
Credit: Cheech / Fly Fish Food