 Fly Tying Inventory
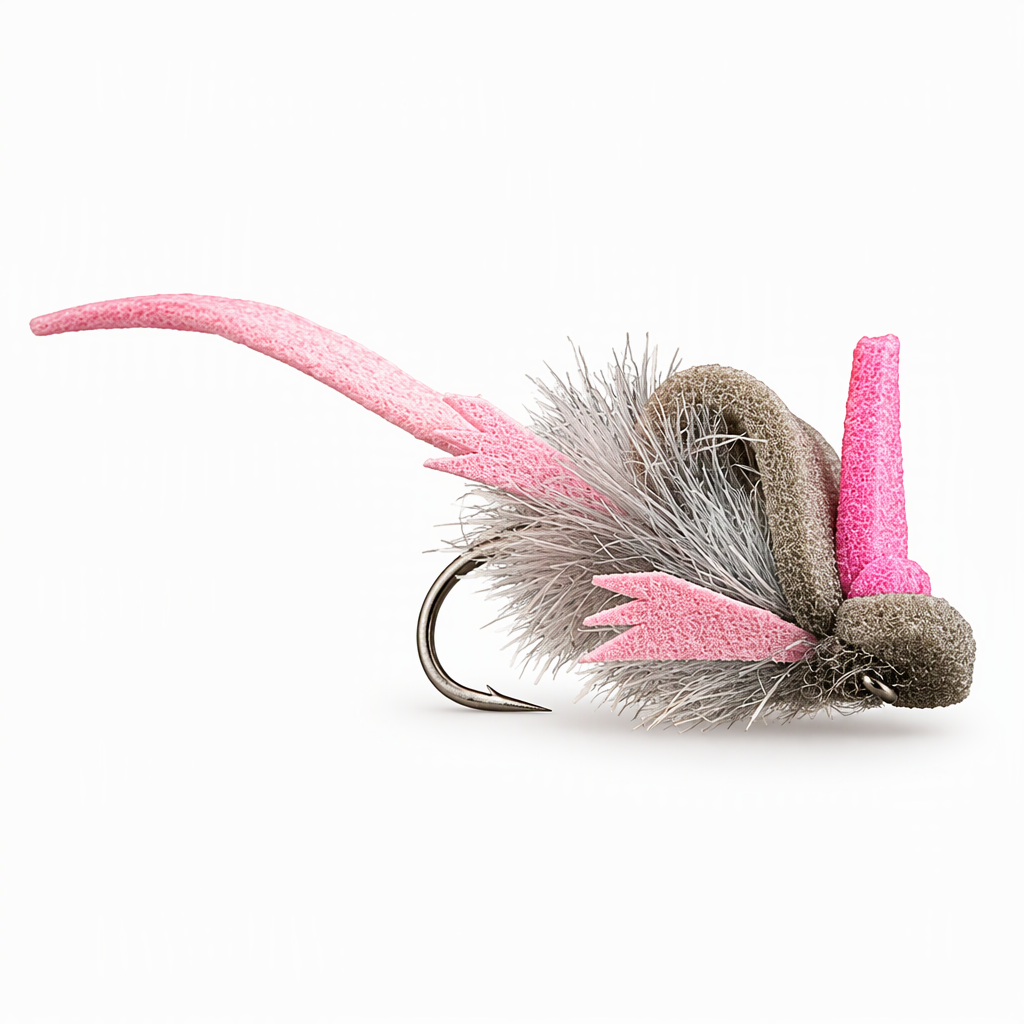
Bubble Gum Mouse
Bubble Gum Mouse is a lightweight surface mouse tied by Clark "Cheech" Pierce for big brown trout, bass and other predators at night. It is simple to tie, with a few details that help it swim like a real mouse, and it can be cast on a light fly rod. A leech leather tail is built on a mono core, the legs are cut from the same leather, and a foam shell covers a chenille body. Tied in bright pink and gray here, it also works in natural tones. Tied here on a size 4 hook.
Ready to tie this?
This pattern needs 8 materials. Sign up free to check which ones you already own.
Materials
Gamakatsu B10S Stinger hook, size 4 (or Fulling Mill FM6040 Streamer Stripper, size 4)
4
UTC Ultrathread 140 Denier, dark gray (or Semperfli Classic Waxed 6/0, gray)
Dark Gray · 140 denier
Maxima Chameleon leader material, 20 lb, for the tail core
20 lb
Leech Leather, bubblegum pink (or worm tan), for the tail and legs
Bubblegum Pink
Liquid Fusion Adhesive, 2 oz, to glue the tail
Senyo's Super Satin Chenille 20mm, grey (or brown)
Grey · 20mm
MFC High Rise Foam 3mm, grey, for the top shell (or Hareline Hi Float Foam, gray)
Grey · 3mm
MFC High Rise Foam 3mm, pink, for the indicator (or Hareline Hi Float Foam, pink)
Pink · 3mm
How to Tie the Bubble Gum Mouse
- 1
Step 1
Before going to the vise, cut a strip of Leech Leather and spread Liquid Fusion along it.
- 2
Step 2
Lay a length of mono along the glued strip, fold the leather around it and pinch it until it holds. Trim the leather end to shape and let it set.
- 3
Step 3
Set the hook in the vise, start the thread and wrap along the shank to the rear.
- 4
Step 4
Bind the mono end of the tail to the rear of the shank so the leather trails past the bend, then tie in the chenille just ahead of it.
- 5
Step 5
Cut two leg pieces from Leech Leather and snip notches into one end of each for toes.
- 6
Step 6
Tie one leg on each side at the rear of the body with the notched ends pointing back and down.
- 7
Step 7
Wrap the chenille part of the way up the shank.
- 8
Step 8
Cut a strip of gray foam and tie it in on top of the chenille, leaving the long end free.
- 9
Step 9
Cut a second pair of legs and tie them in on each side near the front of the body.
- 10
Step 10
Wrap the chenille the rest of the way forward, tie it off behind the eye and trim it.
- 11
Step 11
Pull the foam forward over the top in a raised hump, leaving a tab past the tie-down point, and bind it down behind the eye.
- 12
Step 12
Tie in a strip of pink foam at the same point so it stands up behind the head as an indicator.
- 13
Step 13
Trim the foam tab and fold it back over the tie-down to form a short blunt head.
- 14
Step 14
Bring the thread forward, whip finish behind the eye and cut the thread.
Watch Tying Tutorial
https://www.youtube.com/watch?v=Arx6JXEIueQ
Credit: Cheech / Fly Fish Food