 Fly Tying Inventory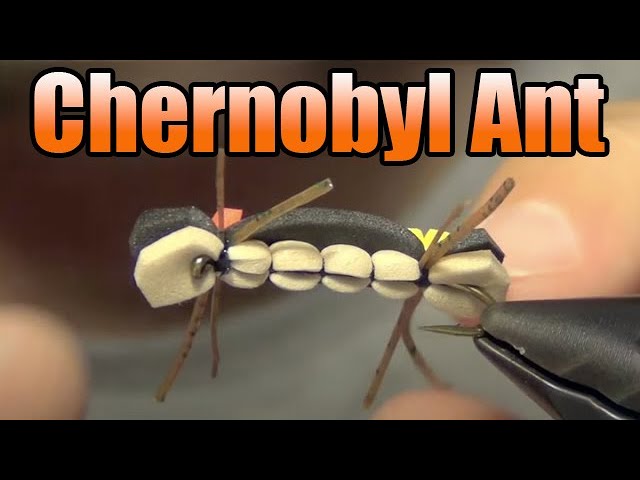
Chernobyl Ant
The original foam pattern that started the foam revolution in fly tying. Created for Wyoming cutthroat trout, this oversized foam terrestrial imitates everything from hoppers to beetles to stoneflies. Its legendary buoyancy supports heavy dropper nymphs, and the segmented foam body with rubber legs draws aggressive strikes from trout, bass, and panfish. Effective from Alaska to Argentina and everywhere in between.
🪶 Ready to tie this?
This pattern needs 9 materials. Sign up free to check which ones you already own.
Materials
2XL or 3XL dry fly/nymph hook (Daiichi 1280 or TMC 5212), sizes 4-12
Black, brown, or orange 6/0 to 140 denier
2mm closed-cell foam strip, tan
2mm closed-cell foam strip, black
Medium round rubber legs, black or brown
2mm closed-cell foam, orange or yellow, for visibility
Zap-A-Gap super glue for durability
How to Tie the Chernobyl Ant
- 1
Step 1
Cut two strips of 2mm foam about as wide as the hook gap—tan for the belly and black for the back. Cut a small piece of bright orange foam for the indicator.
- 2
Step 2
Secure hook in vise. Attach thread behind the eye and make a smooth thread base back to near the bend.
Use heavier thread (140 denier) to avoid cutting through the foam.
- 3
Step 3
Trim foam strip ends to a point for easier tie-in. Place tan foam strip on the underside and black foam on top. Tie both in at the hook bend with firm wraps. Apply a drop of super glue.
- 4
Step 4
Fold and tie in a pair of rubber legs on each side at the rear tie-in point using the pinch method.
- 5
Step 5
Advance thread about one-third of the shank forward. Pull both foam strips back and tie down to create the first body segment. Add another pair of rubber legs.
- 6
Step 6
Advance thread another third forward. Tie down foam again for the second segment. At this midpoint, tie in the bright indicator foam on top between the layers.
- 7
Step 7
Bring foam strips forward and tie down one final time behind the eye, leaving space for a tie-off. Add a front pair of rubber legs.
- 8
Step 8
Form a small thread head under the foam, whip finish, and trim thread. Trim foam neatly—head extends just past the eye, tail at rear. Cut legs to roughly body length on each side.
- 9
Step 9
Apply small drops of super glue at key thread wraps under the foam for maximum durability.
Watch Tying Tutorial
https://www.youtube.com/watch?v=OEzKjxv_kC0
Credit: Allan Woolley
More patterns like this
- Terrestrial
- Intermediate
- Rainbow Trout
- Brown Trout
- Cutthroat Trout
- Smallmouth Bass
- Largemouth Bass
- Bluegill