 Fly Tying Inventory
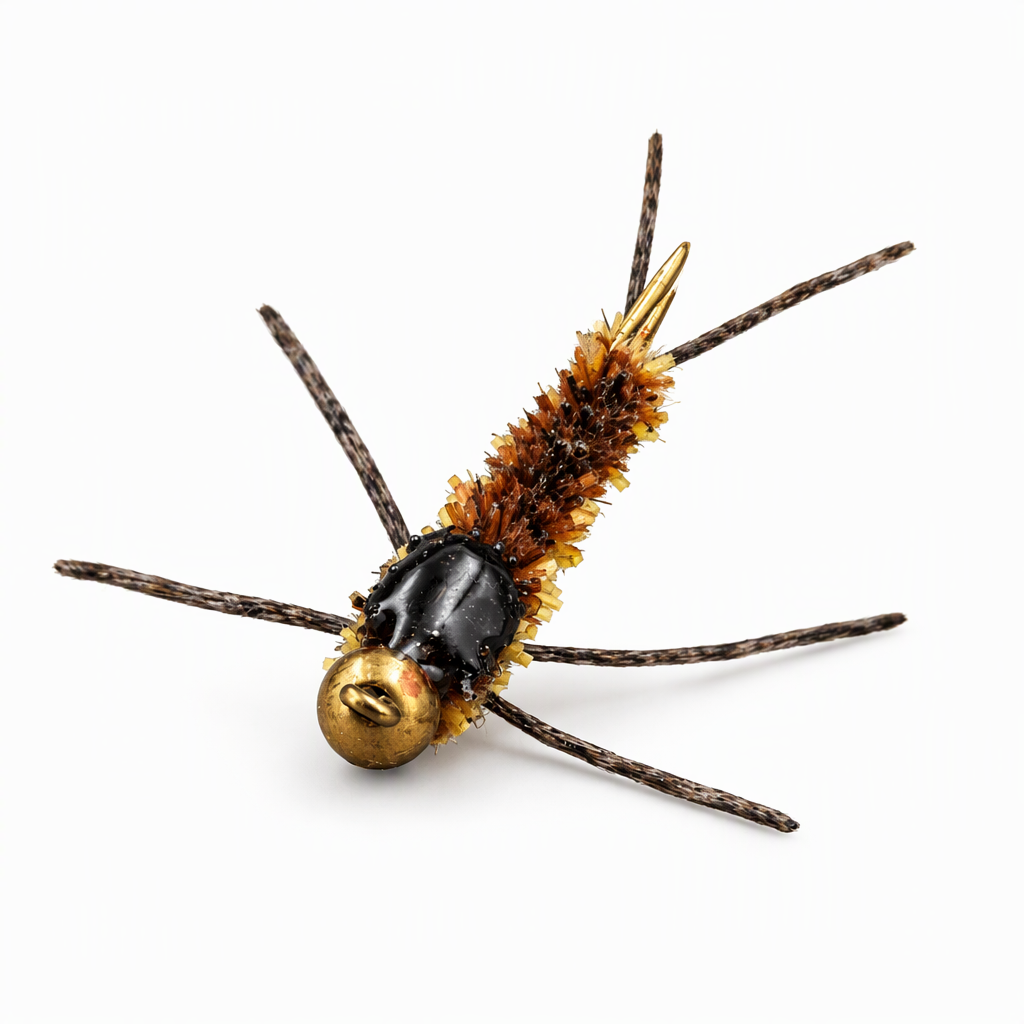
Chewy Stonefly
Chewy Stonefly is a fast stonefly nymph from Cheech, built on a keel hook with a chewing gum worm chenille body. Stoneflies live on the bottom, where snags claim plenty of flies, so this one is meant to be quick enough that a lost fly hurts less. Marker darkens the back and UV resin forms the wing case, and it looks harder to tie than it is. Change the colors to match the stoneflies in your local water. Tied here on a size 6 hook, with size 8 bent nymph hooks as options.
Ready to tie this?
This pattern needs 9 materials. Sign up free to check which ones you already own.
Materials
Firehole Stones Plated Slotted Tungsten Beads, gold, 4.5mm (or Fulling Mill slotted tungsten, gold, 4.6mm)
Gold · 4.5mm
Lead or lead-free wire, for weight behind the bead
Fulling Mill Flex-Floss, brown, for the tails and legs (or Life-Flex, brown)
Brown
FNF 3mm Chewing Gum Worm Chenille, Dallas Brown (or Fulling Mill Chewy Worm Chenille, small, tan)
Dallas Brown · 3mm
Chartpak fly tying marker, black
Black
Chartpak fly tying marker, sepia (medium brown)
Sepia
Solarez UV Cure Resin, medium hard (or thin hard)
How to Tie the Chewy Stonefly
- 1
Step 1
Slide the slotted bead onto the hook and mount the hook in the vise.
- 2
Step 2
Wrap the wire around the straight front section of the shank, right behind the bead.
- 3
Step 3
Start the thread behind the wire and wrap back over the keel to the bend.
- 4
Step 4
Tie in a length of floss at the bend and split it so two short tails fork out past the bend. Trim any excess.
- 5
Step 5
Wrap the thread forward through the wire to the bead and back to the bend to lock the weight in place.
- 6
Step 6
Tie in the chewing gum chenille at the bend with the length trailing to the rear.
- 7
Step 7
Bring the thread forward and tie in two lengths of floss across the shank for two pairs of legs, spacing them along the front half of the fly.
- 8
Step 8
Wrap the chenille forward, working it between the legs so they stick out at the sides.
- 9
Step 9
Tie off the chenille behind the bead, trim the waste, whip finish and cut the thread.
- 10
Step 10
Trim the legs and tails to length.
- 11
Step 11
Rotate the vise so the hook point faces up, which is how a keel hook rides. Color the top of the body with the sepia marker, then darken the thorax with the black.
- 12
Step 12
Coat the darkened thorax with a thin layer of UV resin and cure it.
- 13
Step 13
Add a second, heavier coat of resin over the thorax to build a glossy wing case, then cure it.
Watch Tying Tutorial
https://www.youtube.com/watch?v=XoTGAwN-D_I
Credit: Cheech / Fly Fish Food