 Fly Tying Inventory
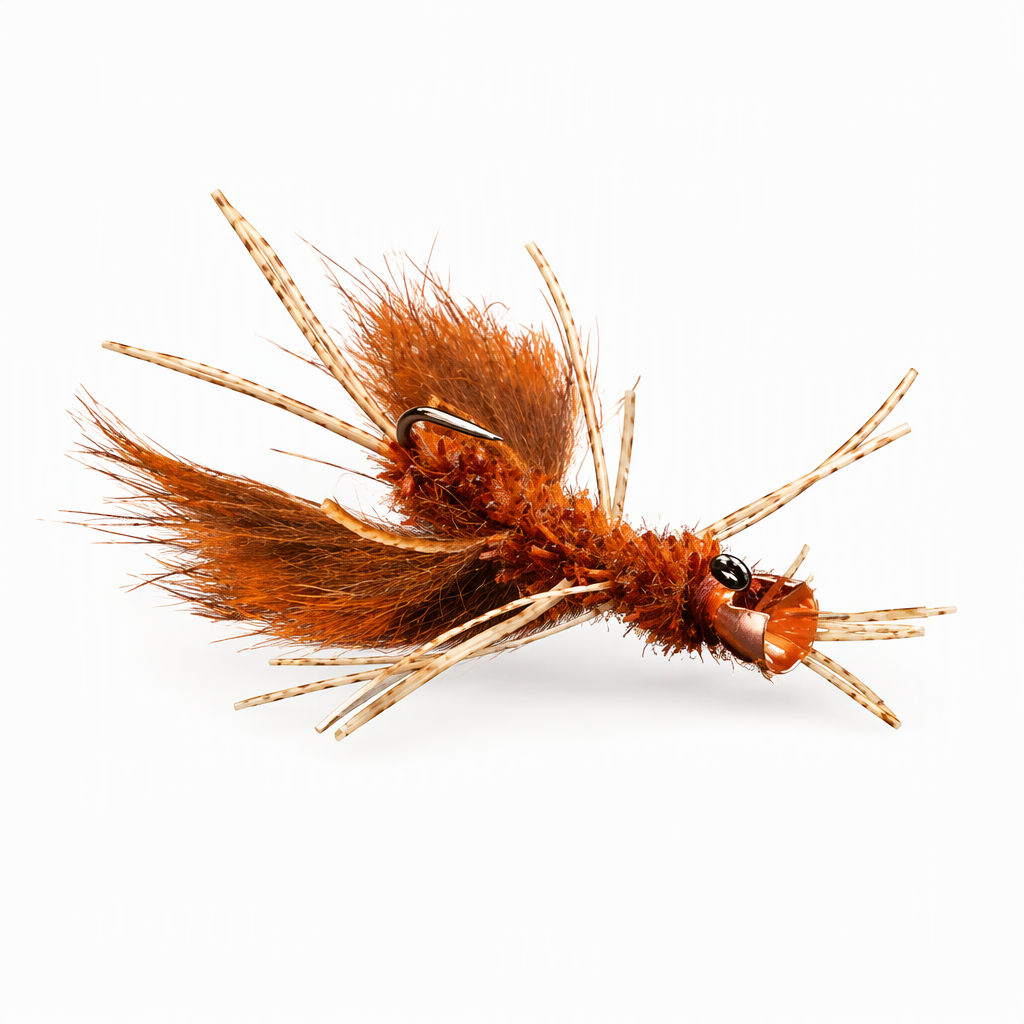
Claw Dawg
Claw Dawg is AJ Jorgensen's balanced crayfish pattern, built with an uncomplicated shape. A slotted tungsten cone sits backward on a 90 degree jig hook, so the fly sinks quickly and hangs level. It is tied back to front, with the tail at the hook eye and the antennae and pine squirrel claws at the bend. Hang it under an indicator, or hop it across the bottom on a slow strip. Tied here on a size 4 hook.
Ready to tie this?
This pattern needs 7 materials. Sign up free to check which ones you already own.
Materials
Fulling Mill FM6050 Stealth Jig hook, size 4 (or Kumoto KJ236 90 degree jig hook)
4
Semperfli Classic Waxed Thread 6/0, rust (or UTC Ultrathread 140 Denier, rusty brown)
Rust · 6/0
Fulling Mill Slotted Tungsten Conehead, small 5.0mm, copper (or gold)
Copper · 5.0mm
Fulling Mill Micro Flex-Floss, March Brown, for the tail, antennae and legs (or small Life-Flex Spandex Material, tan)
March Brown
Glue, to lock the cone in place
Fulling Mill Chewy Worm Chenille, small, brown (or FNF 3mm Chewing Gum Worm Chenille, caddis brown)
Brown · Small
Pine Squirrel Zonkers, rust, for the claws (or zonked pine squirrel skin, rust)
Rust
How to Tie the Claw Dawg
- 1
Step 1
Slide the cone onto the hook with its wide end facing the hook eye and park it back at the bend. Set the hook in the vise, point down.
- 2
Step 2
Start the thread on the shank just behind the hook eye. Tie in a small bunch of Flex-Floss strands there, with the tips running out past the eye.
- 3
Step 3
Fold the rear ends forward and bind them down so all the strands flare past the eye in a fan for the tail.
- 4
Step 4
Cover the tie-in with neat thread wraps along the front of the shank, then whip finish and cut the thread.
- 5
Step 5
Flip the hook so the point rides up. Put a little glue on the wraps and slide the cone forward over them until it seats, with the tail flaring out of the wide end.
- 6
Step 6
Restart the thread behind the cone and lay a thread base back to where the bend begins. Flip the hook point down again.
- 7
Step 7
Tie in a few more strands of Flex-Floss at the start of the bend, with the tips running back past it for the antennae.
- 8
Step 8
Tie in the chenille at the same spot and take a few turns to build a small ball at the base of the antennae. Let the rest of the chenille hang free.
- 9
Step 9
Take a section of pine squirrel from the zonker strip and tie it in against the chenille ball, with the tips running back past the bend for the first claw.
- 10
Step 10
Tie a second section on the opposite side of the ball so the two claws splay apart. Turn the hook in the vise as needed to reach each side.
- 11
Step 11
Tie in Flex-Floss strands across the shank just ahead of the claws so the first legs stick out to the sides. Advance the thread to the back of the cone.
- 12
Step 12
Wrap the chenille forward in touching turns to the back of the cone. Tie it off, trim the excess and whip finish.
- 13
Step 13
Use a needle or threader to pull another length of Flex-Floss through the chenille body for a second set of legs.
- 14
Step 14
Trim the legs and antennae to length and pick out any stray fur.
Watch Tying Tutorial
https://www.youtube.com/watch?v=w1X7PrJF5E0
Credit: AJ Jorgensen / Fly Fish Food