 Fly Tying Inventory
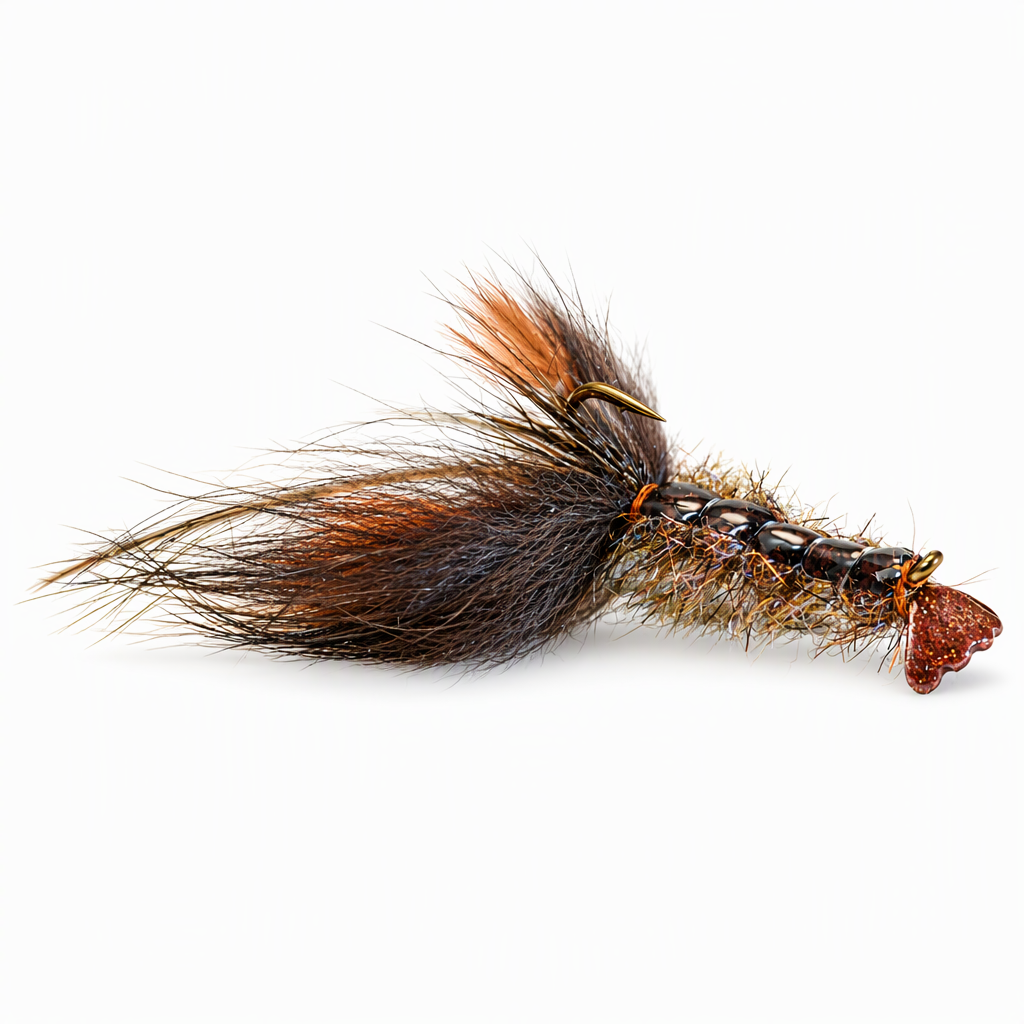
Creamer's HD Craw
Jeff Creamer developed the HD Craw after generic crayfish patterns started getting refused by bass in very clear water. Instead of a heavy head, a tungsten bead hangs off the shank on tippet or mono, so the fly sinks at a natural angle and rests point up on the bottom. Rabbit claws with orange hot spots, a deer hair mouth and a segmented shell back give it a detailed profile. Strip it, drift it on a tight line through deep water, or sight fish it to bass, and try it for trout too. Tied here on a size 6 hook.
Ready to tie this?
This pattern needs 13 materials. Sign up free to check which ones you already own.
Materials
Rabbit zonker strip, fluorescent orange, for the claw hot spots
Fluorescent Orange
Fish Skull Shrimp & Cray Tails, gold, medium (powder coat it to match the bead if you like)
Gold · Medium
Plummeting Tungsten Beads - Classic Colors, nickel, 5/32" (3.8mm), for the keel
Nickel · 5/32" (3.8mm)
Lead free round wire, .020, for the underbody
.020
Senyo's Fusion Foil Legs, barred copper and green foil, standard, for the antennae
Barred Copper and Green Foil · Standard
Montana Fly Company Skinny Skin, mottled brown, for the shell back
Mottled Brown
RIO Fluoroflex Plus tippet, 5X
5X
Arizona Diamond Dub, ice blue brown
Ice Blue Brown
How to Tie the Creamer's HD Craw
- 1
Step 1
Make the claws first. Clamp a piece of Micro Rabbit strip in the vise and start the rusty brown thread on it near the jaws.
- 2
Step 2
Cut a small clump of fluorescent orange fur from the zonker strip and tie it on at the free end of the hide so the orange extends past the tip of the claw. Whip finish, cut the claw free, and tie a matching second claw. Set both aside.
- 3
Step 3
Mount the hook and start the thread. Bind the Cray Tail in place at the eye end of the shank so the flat tail sits out past the eye.
The fly is built backward. The tail goes at the eye and the claws go at the bend, because a fleeing crayfish moves tail first.
- 4
Step 4
Slide the nickel bead onto a short piece of tippet or mono, then lash the mono to the side of the shank away from the point so the bead hangs just off the shank toward the eye.
Hanging the bead keeps the fly from dropping nose first the way a heavy head does, and it turns the hook point up.
- 5
Step 5
Wrap the lead free wire along the shank for the underbody and cover it with thread so it cannot slide.
- 6
Step 6
At the bend, tie in strands of Fusion Foil Legs so they extend past the bend for the antennae. Trim any excess.
- 7
Step 7
Switch to the white Veevus GSP. Cut a bunch of deer hair from the strip, clean and stack it, and tie it in at the bend for the mouth.
- 8
Step 8
Tie in one claw on each side of the bend, against the deer hair.
The stiff deer hair holds the soft claws apart in the water.
- 9
Step 9
Go back to the rusty brown thread. In front of the claws, tie in a strip of Skinny Skin and a length of 5X tippet, and leave both trailing over the bend.
- 10
Step 10
Form a dubbing loop, fill it with Diamond Dub, and spin it into a shaggy rope.
- 11
Step 11
Wrap the dubbing rope forward to the eye, tie it off, and trim the excess.
- 12
Step 12
Turn the hook point up. Pull the Skinny Skin forward along the top of the fly in that position and tie it off behind the eye.
- 13
Step 13
Wrap the tippet forward over the shell in open, even turns to segment the body, and tie it off behind the eye. Trim the skin and the tippet, then whip finish.
- 14
Step 14
Comb the dubbing out along the sides so it reads as legs, then trim any fibers that spoil the profile.
Watch Tying Tutorial
https://www.youtube.com/watch?v=I2H5DSIZaT4
Credit: Jeff Creamer / Fly Fish Food