 Fly Tying Inventory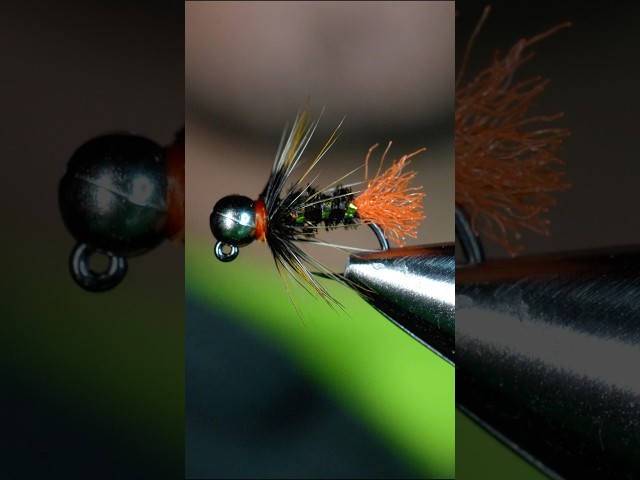
Depth Charge (Heavy Euro)
A purpose-built heavy anchor fly designed to get your Euro nymph rig to the bottom fast in deep pools and heavy currents. Features an oversized tungsten bead, optional lead underbody, and a slim dubbed body with a bright hotspot collar. The ultimate depth-finder for competition and everyday Euro nymphing.
🪶 Ready to tie this?
This pattern needs 8 materials. Sign up free to check which ones you already own.
Materials
Jig-style barbless hook, size 12-16 (e.g., Fulling Mill Jig Force, Hanak 450BL)
Large slotted tungsten bead, 3.5-4.0mm, gold or black
Lead-free or lead wire underbody (.015) for extra mass
Black 8/0 or 70 Denier
Coq de León fibers, 5 strands
Natural hare's ear or squirrel dubbing, slim profile
Medium copper wire
Hot orange Ice Dub or fluorescent dubbing
How to Tie the Depth Charge (Heavy Euro)
- 1
Step 1
Place a large slotted tungsten bead (3.5-4.0mm) on the jig hook, small slot toward the hook eye. Secure in vise.
Use the largest bead the hook can support—weight is the whole point of this pattern.
- 2
Step 2
Start thread behind the bead. If additional weight is needed, wrap lead wire and push into the bead cavity.
- 3
Step 3
Build a thread base down to the hook bend, creating a smooth foundation.
- 4
Step 4
Tie in 5 Coq de León fibers for a short, stiff tail at the bend.
- 5
Step 5
Tie in a length of copper wire for ribbing.
- 6
Step 6
Dub a slim, tapered body of hare's ear or squirrel dubbing from the bend to the bead.
Keep the body slim despite the heavy bead—slim bodies sink faster.
- 7
Step 7
Counter-wrap the copper wire rib over the body in open turns. Secure and trim.
- 8
Step 8
Dub a small collar of hot orange Ice Dub just behind the bead for a bright hotspot trigger.
- 9
Step 9
Whip finish behind the bead and apply a drop of head cement.
Tie this pattern in multiple bead sizes so you can adjust weight for different water depths and speeds.
Watch Tying Tutorial
https://www.youtube.com/watch?v=HAz8kljujAI
Credit: Euro nymphing competition community; TroutStrike; AvidMax Blog