 Fly Tying Inventory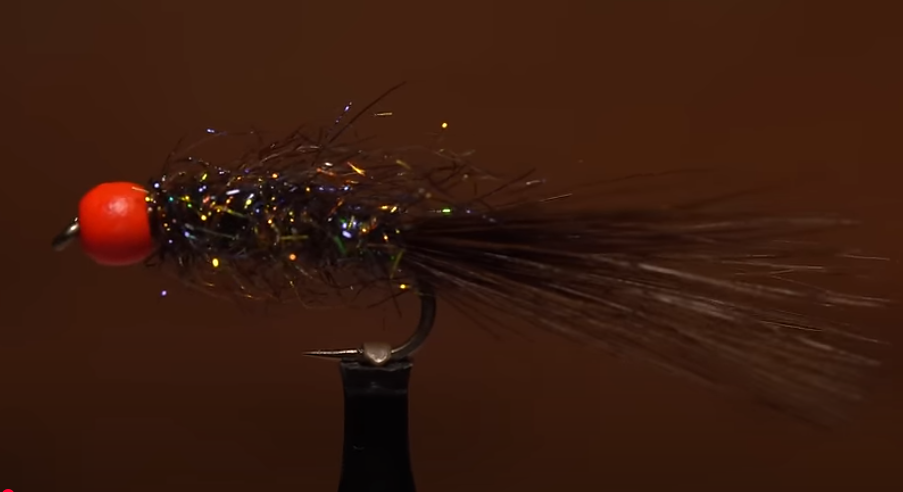
Egg Sucking Leech
The Egg Sucking Leech combines the pulsing movement of a leech pattern with the visual punch of a salmon egg at the head. A proven producer for steelhead, salmon, and trout, this pattern works year-round and is especially deadly during spawning runs. The bright bead or chenille egg head triggers strikes even from reluctant fish.
🪶 Ready to tie this?
This pattern needs 8 materials. Sign up free to check which ones you already own.
Materials
2XL-3XL streamer hook, sizes 4-10 (TMC 5263 or equivalent)
1/8-inch fluorescent fire orange bead for egg head
Brown or black 6/0 or 140 denier
Dark brown or black marabou, one blood quill plume
Pearl or silver Crystal Flash, 4-6 strands in tail
SLF Prism dubbing, chocolate brown, or black chenille
Medium silver wire for durability
How to Tie the Egg Sucking Leech
- 1
Step 1
Slide the fluorescent orange bead onto the hook and push it up to the eye. Secure the hook in the vise.
- 2
Step 2
Start thread behind the bead and wrap a smooth thread base back to the bend of the hook.
- 3
Step 3
Tie in a full plume of dark brown marabou for the tail, about one hook-shank length. Add 4-6 strands of Crystal Flash if desired.
- 4
Step 4
If using a wire rib, tie it in at the tail base and let it hang.
- 5
Step 5
Create a dubbing loop or apply SLF Prism dubbing to the thread. Wrap forward in even turns to form a slightly tapered body, stopping one bead-width behind the bead. Secure and trim.
If using chenille, wrap touching turns forward. For extra movement, use a dubbing brush to pick out fibers after wrapping.
- 6
Step 6
If using hackle, tie in and palmer it along the body. Secure near the bead.
- 7
Step 7
If using wire rib, counter-wrap forward in open spirals to reinforce hackle. Secure and trim.
- 8
Step 8
Push all materials snug against the bead. Form a neat thread collar between body and bead, whip finish, and apply head cement.
Watch Tying Tutorial
https://www.youtube.com/watch?v=Wn8wGgVTlRE
Credit: Traditional