 Fly Tying Inventory
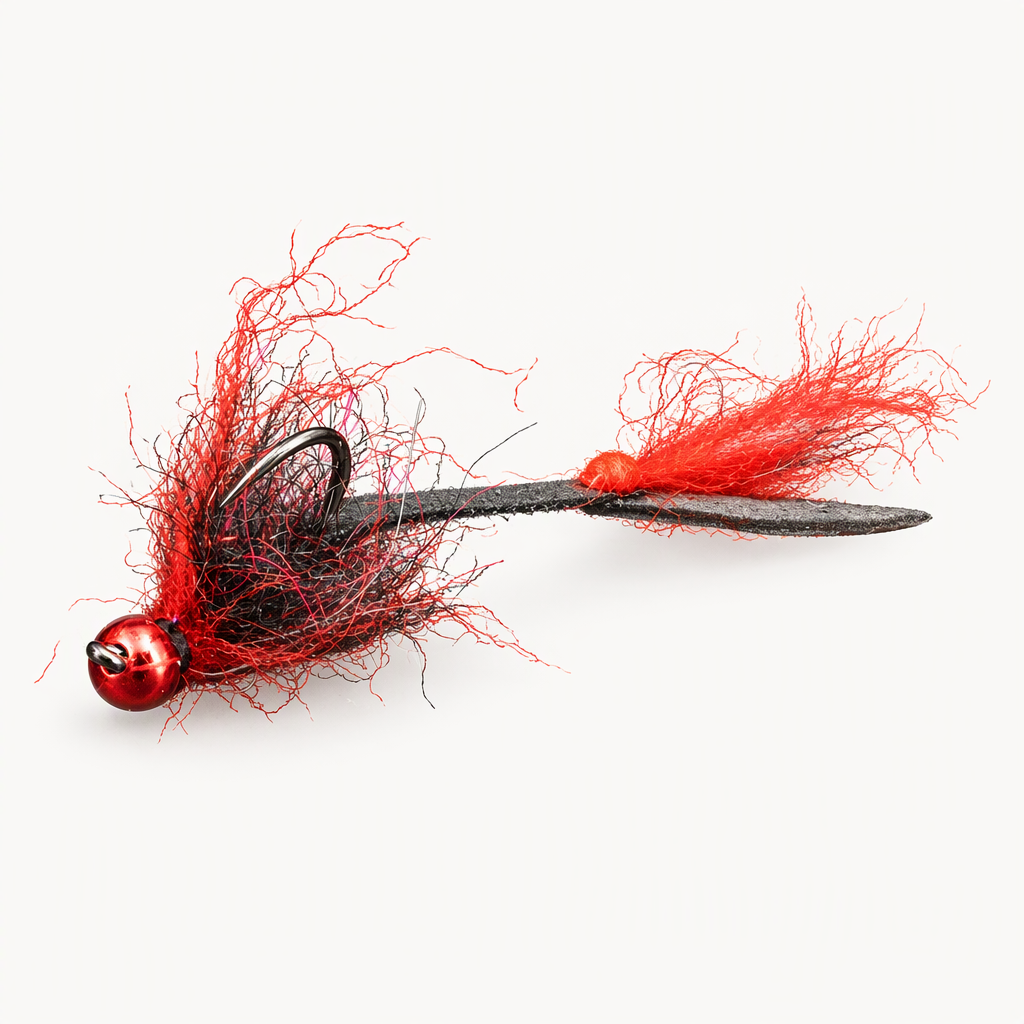
Grim Streaper
Cheech came up with the Grim Streaper during a free-form session at the vise, putting materials together just to see what would work. The tail is built off the hook from latex-style materials, joined with glue and red UV resin, then tied on behind a slotted tungsten bead. He expected it to come apart, but it proved durable enough to become a fishable jig streamer. A black claret Seal X body finishes it. Treat it as a starting point for your own flies built from latex. Tied here on a size 14 hook.
Ready to tie this?
This pattern needs 9 materials. Sign up free to check which ones you already own.
Materials
Fulling Mill FM5125 Jig Force Short Barbless hook, size 14 (or Umpqua XC210BL-BN Perdi-Jig Hook)
14
Danville Flat Waxed Nylon Thread, 70 denier, black (or red)
Black · 70 denier
Fulling Mill Slotted Tungsten Beads, metallic red, 3.2mm (or Hanak Metallic+ Slotted Tungsten Beads, red, 3.5mm)
Metallic red · 3.2mm
Fulling Mill Nymph-Rap, micro 2mm, black, for the tail stem (or Kiley's Nymph Skins, black)
Black · 2mm
Fly Tyer's Z-Ment, for joining the tail parts
Fulling Mill Micro Minnow Dubbing, Red UV, for the tail tip and a small collar behind the bead (or Blurple UV)
Red UV
Solarez Bone-Dry Color UV Resin, red, for coating the tail join
Red
Fulling Mill Seal X, black claret (or Bibio)
Black claret
How to Tie the Grim Streaper
- 1
Step 1
Slide the bead onto the hook, seat it behind the eye and start the thread behind the bead.
- 2
Step 2
Build the tail off the hook. Cut a length of Nymph-Rap for the stem.
- 3
Step 3
Cut a small V from the Exo Skin to form the forked tip.
- 4
Step 4
Use a bodkin to glue the V to the end of the stem with Z-Ment.
- 5
Step 5
Pinch a few fibers of red Micro Minnow Dubbing and glue them at the join with more Z-Ment so they trail back past the fork.
- 6
Step 6
Coat the join with red Bone-Dry resin and cure it with a UV light.
Flex the finished tail in your fingers to check that the join holds.
- 7
Step 7
Lay the stem along the top of the shank with the fork trailing past the bend. Bind the front of the stem down behind the bead and trim any tag.
- 8
Step 8
Dub Seal X onto the thread and wrap a short, shaggy body behind the bead, leaving the rear of the stem bare.
- 9
Step 9
Pick out the dubbing fibers along the body.
- 10
Step 10
Dub a pinch of red Micro Minnow Dubbing onto the thread and wrap a small collar right behind the bead.
- 11
Step 11
Whip finish behind the bead and trim the thread.
Watch Tying Tutorial
https://www.youtube.com/watch?v=tScvxn715fs
Credit: Cheech / Fly Fish Food