 Fly Tying Inventory
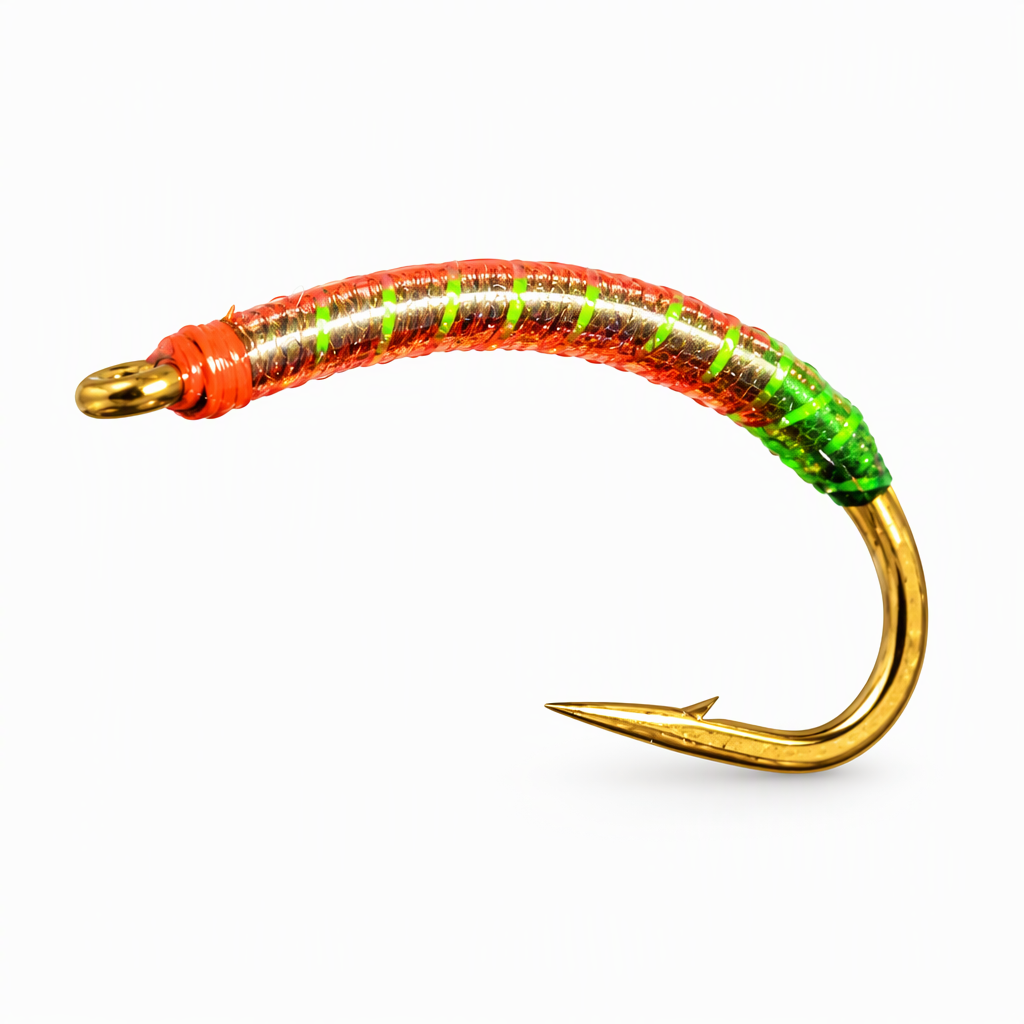
Gut Bomb Bloodworm
Curtis Fry developed the Gut Bomb Bloodworm to imitate a chironomid larva, a staple food for stillwater trout. After many versions, he settled on the materials that gave the most translucent look, since its see-through body stands out even more than its color and slim shape. Clear scud back and midge flash make up the body, colored with Sharpies, while UV resin builds a slender clear shell around the guts and holds the color. Switch markers for all red, red and tan or red and green. Tied here on a size 10 hook.
Ready to tie this?
This pattern needs 6 materials. Sign up free to check which ones you already own.
Materials
Hanak Hooks Model 310 BL Nymph (H 310 BL buzzer hook), size 10
10
Midge Flash, cream
Cream
Sharpie permanent markers, red, plus tan or green for a two-tone body
Red
Loon UV Clear Fly Finish - Flow, for the body coat
How to Tie the Gut Bomb Bloodworm
- 1
Step 1
Mount the hook in the vise. Start the thread behind the eye and wrap back around the curve of the hook.
- 2
Step 2
Tie in the clear scud back and a strand of cream Midge Flash at the rear of the body, then trim the excess.
- 3
Step 3
Wrap the thread forward to just behind the eye, keeping the underbody slender.
- 4
Step 4
Wrap the clear scud back forward over the thread to form a clear body, tie it off behind the eye and trim.
- 5
Step 5
Color the wrapped body with the red Sharpie, adding a second color such as green at the rear if you like.
Different marker colors are all it takes to change the fly from all red to red and tan or red and green.
- 6
Step 6
Wrap the Midge Flash forward in open turns over the colored body, tie it off behind the eye and trim.
- 7
Step 7
Whip finish behind the eye and cut the thread.
- 8
Step 8
Coat the body with Flow resin and cure it with a UV light, keeping the profile slender.
- 9
Step 9
Touch up the color with the Sharpies, add another coat of resin and cure again to finish the shell.
Watch Tying Tutorial
https://www.youtube.com/watch?v=Hqj_S5pkvEg
Credit: Curtis Fry / Fly Fish Food