 Fly Tying Inventory
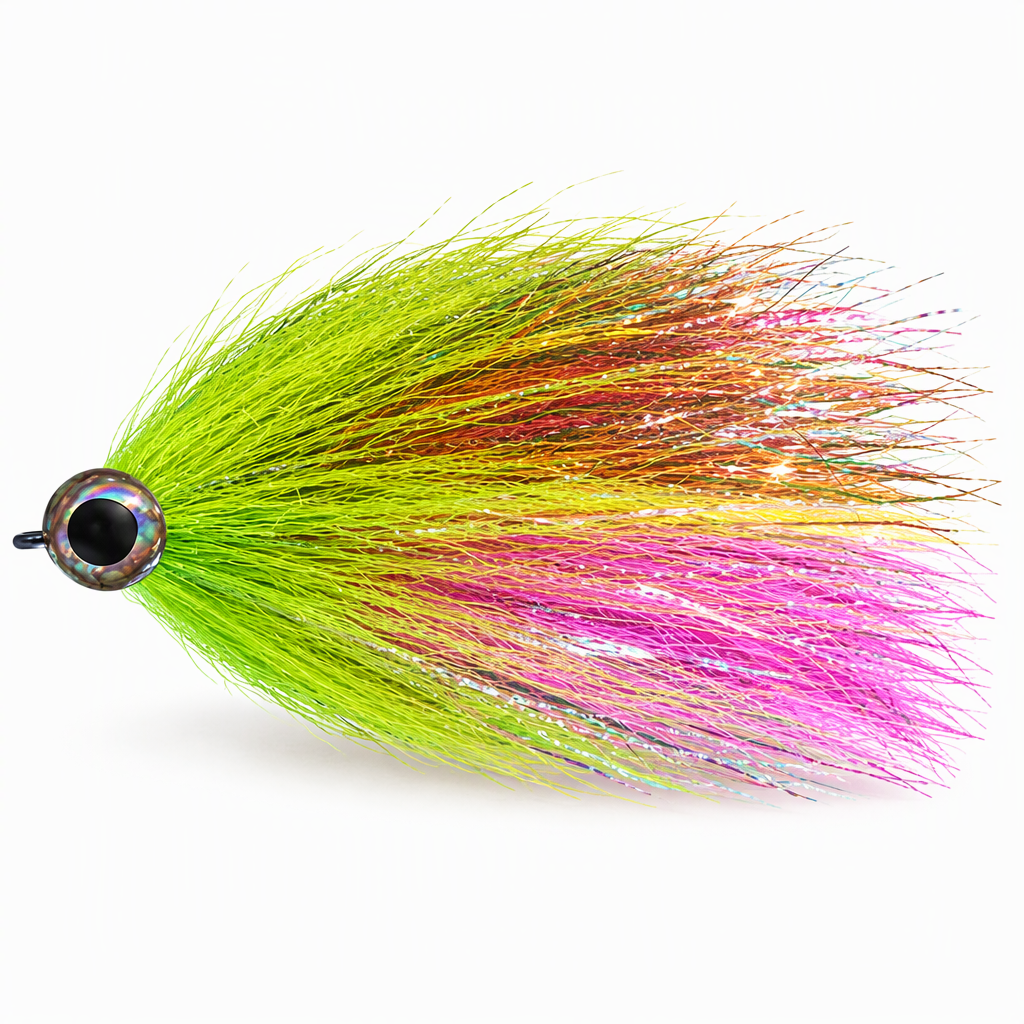
Hang Time
A lightly modified version of Brad Bohen's Hang Time Optic Minnow, a jerk fly for pike and musky. The fly is built in stages along the shank: a tail of bucktail, long schlappen or saddle feathers and Flashabou, then repeated bucktail collars, feather wings and flash. The result has lively action and plenty of hang time between strips, which suits finicky fish. Large 3D eyes set in resin finish the head. Tied here in blue and black on a Partridge Attitude Extra hook.
Ready to tie this?
This pattern needs 11 materials. Sign up free to check which ones you already own.
Materials
Partridge Attitude Extra Hook
Tying thread, 3/0
3/0
Bucktail, for the base of the tail
Blue
Schlappen or saddle feathers, set along the sides of the tail
Hedron Flashabou Magnum, in the tail
Bucktail, for the collars that build the body
Schlappen or saddle feathers, for the wings
Sybai tinsel hair or sparkle hair, in the wings
Crystal flash, for flash along the body
3D eyes, 12mm
12mm
UV resin or epoxy, to set the eyes and coat the head
How to Tie the Hang Time
- 1
Step 1
Mount the Partridge Attitude Extra hook in the vise, start the 3/0 thread and build a firm thread base along the shank.
- 2
Step 2
Tie in a bunch of bucktail at the bend as the base of the tail. Bind the butts down and trim.
- 3
Step 3
Tie in schlappen or saddle feathers along the sides of the bucktail so they extend past it, forming the rest of the tail.
- 4
Step 4
Add strands of Flashabou Magnum to the tail, then build more volume at the tie-in point with additional bucktail.
- 5
Step 5
Move a short way up the shank and tie in a bucktail collar around the hook, then add crystal flash along the sides of the body.
- 6
Step 6
Continue up the shank in sections, layering bucktail collars and flash so the body builds up in bulk toward the front.
- 7
Step 7
Tie in schlappen or saddle feathers on top for the wing, and add Sybai tinsel hair or sparkle hair with them.
- 8
Step 8
Finish the remaining body sections with more bucktail, using a darker shade toward the head, and work forward until the shank is filled.
- 9
Step 9
Build a neat head with thread, whip finish and trim.
- 10
Step 10
Set a 12mm 3D eye on each side of the head, then coat the head and eyes with UV resin or epoxy and cure or let it set.
Watch Tying Tutorial
https://www.youtube.com/watch?v=GK73nfIqkLg
Credit: Martyn White