 Fly Tying Inventory
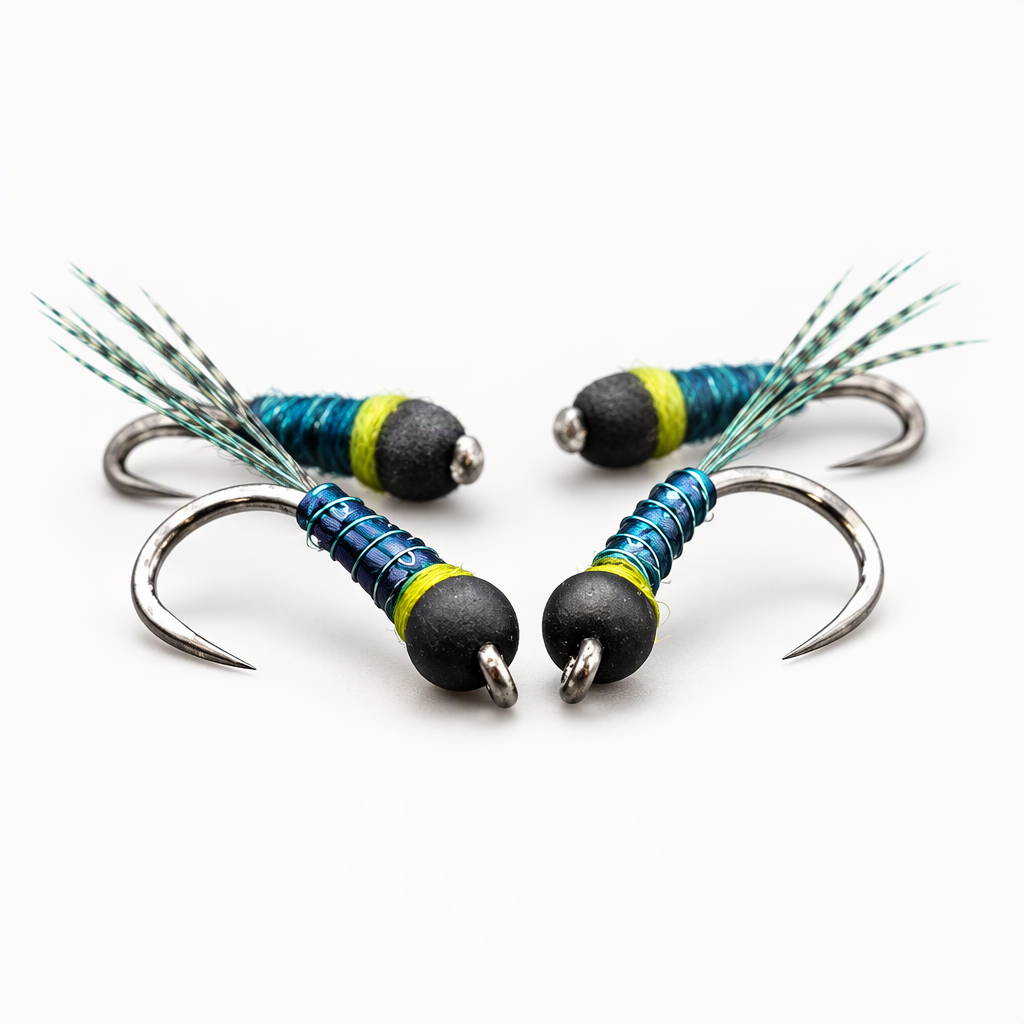
Higa's Blue Angel
Higa's Blue Angel is a general-purpose nymph from Spencer Higa, who began tying it while guiding in eastern Utah, where he wanted a fly that would get down fast in quick water. It is not meant to match one insect. A navy thread body and fluorescent blue pheasant tail add color without shouting, sea green wire segments the body, and a fluorescent yellow band behind the bead acts as a hot spot. A resin coat adds durability and sink rate. Use it on rivers when the hatch is unclear, or under an indicator in high mountain lakes. Tied here on a size 16 hook.
Ready to tie this?
This pattern needs 7 materials. Sign up free to check which ones you already own.
Materials
Fulling Mill FM5005 Heavyweight Champ Barbless hook, size 16
16
Fulling Mill Tungsten Beads, black, 2.4mm
Black · 2.4mm
Glo-Brite Floss for hot-spots and tags, fluorescent yellow no. 10, for the hot spot behind the bead
Fluorescent Yellow · 10
Solarez UV Cure Resin - Bone Dry .5 Oz, to coat the fly
How to Tie the Higa's Blue Angel
- 1
Step 1
Slide the black tungsten bead onto the hook, seat it at the eye and mount the hook in the vise.
- 2
Step 2
Start the navy thread just behind the bead and tie in a length of sea green wire. Bind the wire along the shank to the bend and leave it hanging there.
- 3
Step 3
Stack a small bunch of blue pheasant tail fibers with the tips even and tie them in at the bend for a short tail. Bind the butts forward along the shank and trim the excess.
- 4
Step 4
Wrap the thread up and down the shank to build a smooth, slim body that tapers up toward the bead. Finish with the thread just behind the bead.
- 5
Step 5
Wind the wire forward in evenly spaced open turns to rib the body. Tie it off behind the bead and break or trim the end.
- 6
Step 6
Whip finish the navy thread behind the bead and cut it away.
- 7
Step 7
Start the fluorescent yellow Glo-Brite floss directly behind the bead and wrap a narrow band for the hot spot.
- 8
Step 8
Whip finish the floss and trim the tag.
- 9
Step 9
Coat the body and hot spot with a thin layer of Solarez resin, turning the fly so it covers evenly. Cure it under a UV light.
Watch Tying Tutorial
https://www.youtube.com/watch?v=Ckdcer3xCnI
Credit: Spencer Higa / Fly Fish Food