 Fly Tying Inventory
High Carb Minnow
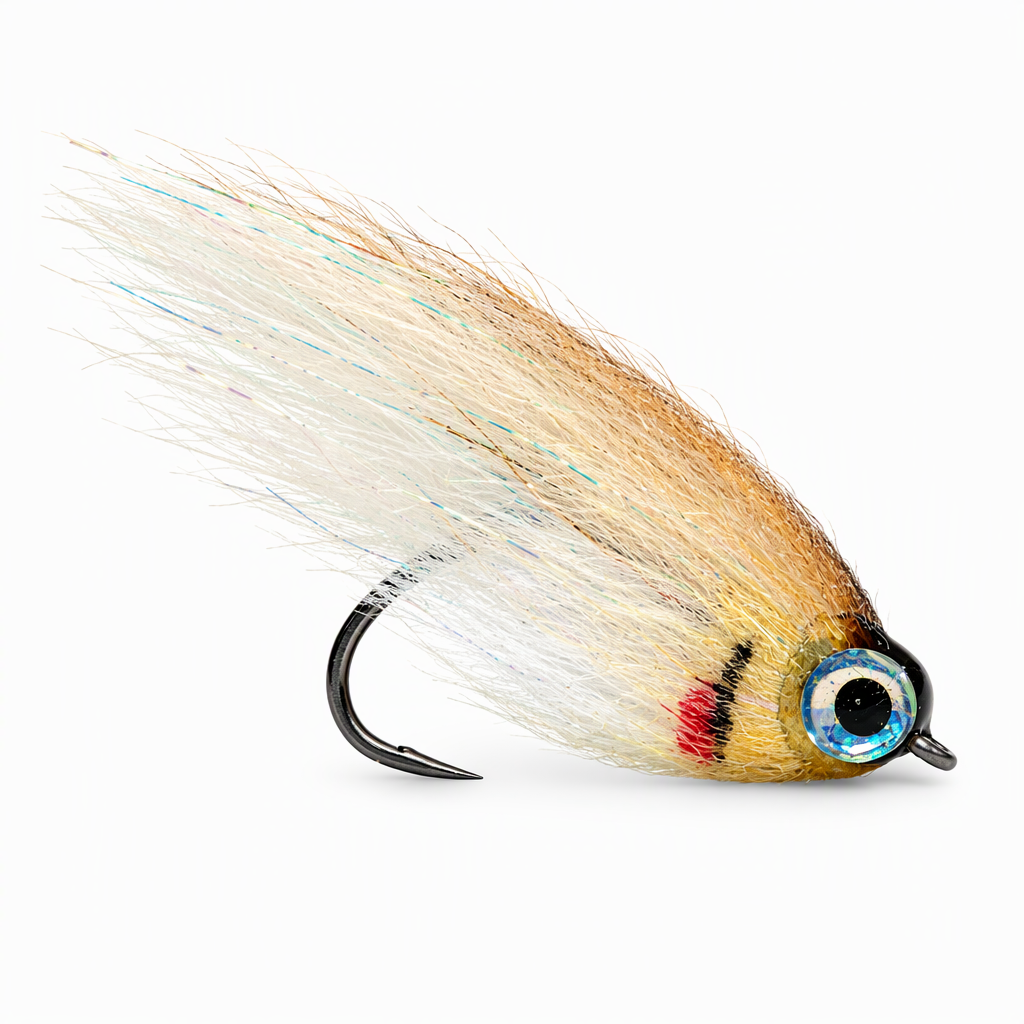
Cheech tied the High Carb Minnow as a heavier companion to his Low Fat Minnow, trading that fly's suspending behavior for a strong jigging action that imitates an injured baitfish. A tungsten cone adds weight with little bulk and shapes the head, and it lets you fish smaller rivers on a floating line. Change the cone from small to large on a size 4 hook to set the sink rate. The craft fur tail tapers easily and is more consistent in color than marabou. Daiichi 3111 and Gamakatsu B10S hooks also work. Tied here on a size 4 hook.
Ready to tie this?
This pattern needs 15 materials. Sign up free to check which ones you already own.
Materials
Fulling Mill FM6040 Streamer Stripper hook, size 4 (or Gamakatsu B10S or Daiichi 3111)
4
Lead wire, .020
.020
Danville Flat Waxed Nylon, 140 denier, white
White · 140 denier
Chartpak fly tying marker, Delta Brown (dark brown)
Dark Brown
Chartpak fly tying marker, Desert Tan (dark tan)
Dark Tan
Chartpak fly tying marker, Goldenrod
Goldenrod
Loon UV Clear Fly Finish - Flow, for the thin coats over the head
Loon UV Clear Fly Finish Thick, to build the head around the eyes
How to Tie the High Carb Minnow
- 1
Step 1
Slide the tungsten cone onto the hook and mount the hook in the vise. Run the cone up to the eye.
- 2
Step 2
Wrap lead wire around the shank behind the cone and push the wraps forward into the back of it.
- 3
Step 3
Add UV resin over the lead wraps and cure it so the cone and lead stay locked in place.
- 4
Step 4
Start the white thread behind the lead and lay a base back along the shank.
- 5
Step 5
Tie in a bunch of white craft fur on the shank with the tips trailing past the bend. Trim the butts and even out the taper with your fingers.
- 6
Step 6
Tie a bunch of tan craft fur on top of the white in the same way to darken the back of the tail.
- 7
Step 7
Tie in the gold polar chenille at the base of the tail and wrap it forward to form the body. Tie it off and trim the excess.
- 8
Step 8
Tie a hank of white Bruiser Blend under the shank by its middle, so half points forward over the cone and half points back.
- 9
Step 9
Tie a hank of tan Bruiser Blend on top of the shank the same way.
- 10
Step 10
Fold the forward fibers back over the cone, secure them behind the head with thread and whip finish.
- 11
Step 11
Trim the head fibers to shape and blend them back toward the body.
- 12
Step 12
Color the back of the head with the dark brown and dark tan markers, then add goldenrod along the sides.
- 13
Step 13
Set a 3D eye on each side of the head, lock it with a touch of UV finish and cure it.
- 14
Step 14
Build the head around the eyes with UV Thick, cure it, then finish with a thin coat of UV Flow and cure again.
Watch Tying Tutorial
https://www.youtube.com/watch?v=0Rjw6m6SyuI
Credit: Cheech / Fly Fish Food