 Fly Tying Inventory
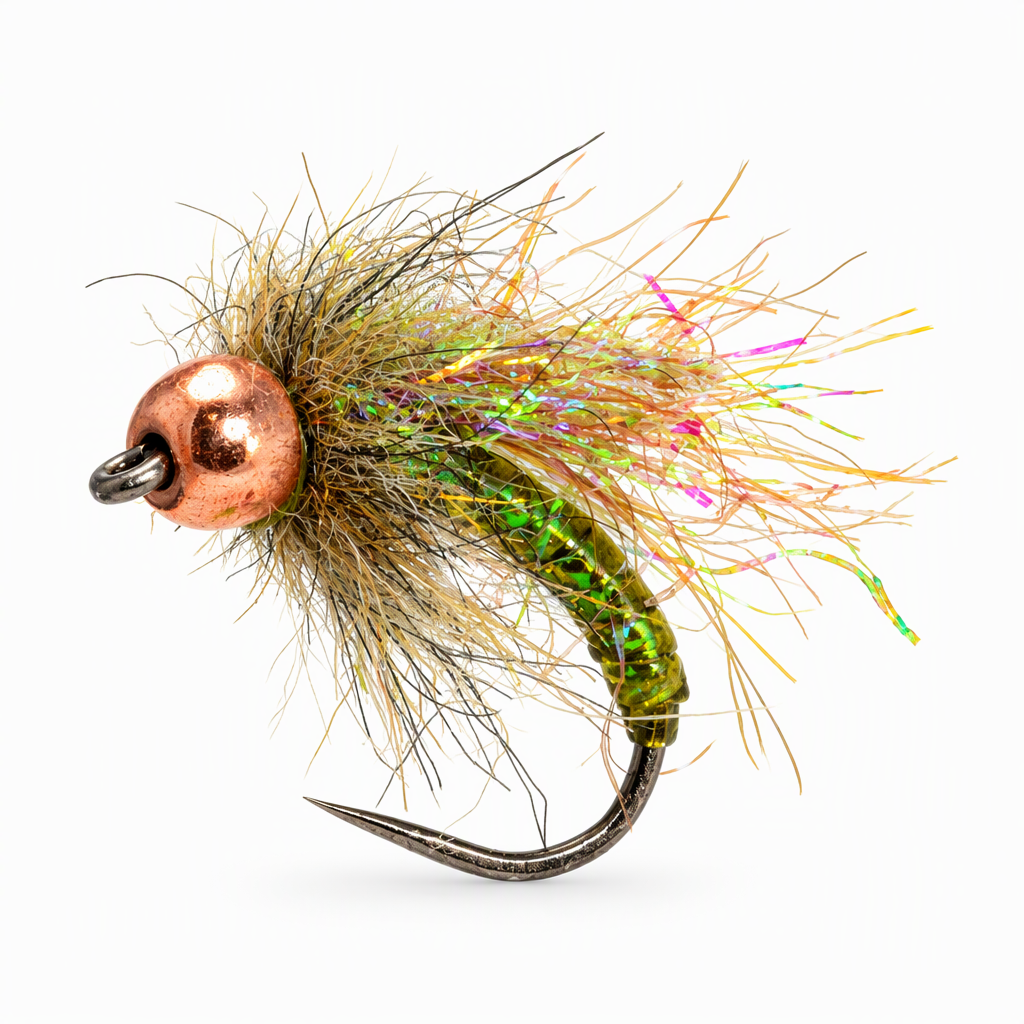
Ice Wing Pupa
The Ice Wing Pupa is a caddis pupa from Cheech, built to be tied in quantity. Details such as wing pads and antennae are left off to keep it quick at the vise. Pearl tinsel under olive tubing gives the abdomen its shine and segmentation, an Ice Dub wing lies back over the body, and a dubbed collar finishes the front. It also works as a general nymph. Rather than match each species, Cheech carries caddis pupae in a few shades and sizes of green and olive, amber, tan and orange. Tied here on a size 14 hook.
Ready to tie this?
This pattern needs 8 materials. Sign up free to check which ones you already own.
Materials
Ice Dub, olive brown
Olive Brown
Arizona Synthetic Dubbing, hare's ear
Hare's Ear
Water-based head cement, for the whip finish
How to Tie the Ice Wing Pupa
- 1
Step 1
Slide the tungsten bead onto the hook, seat it at the eye and mount the hook in the vise.
- 2
Step 2
Start the olive thread behind the bead and tie in a length of olive tubing on top of the shank.
- 3
Step 3
Tie in a length of pearl tinsel at the same point. Bind the tinsel and tubing along the shank and around the bend, then bring the thread back to just behind the bead.
- 4
Step 4
Wrap the tinsel forward in touching turns to cover the thread. Tie it off behind the bead and trim the excess.
- 5
Step 5
Wrap the tubing forward over the tinsel in touching turns to form a segmented abdomen. Stop a little short of the bead to leave room for the wing and collar, then tie it off and trim.
- 6
Step 6
Pull out a small pinch of Ice Dub and tie it in on top, just ahead of the abdomen, with the fibers pointing forward past the bead. Fold them back over the body and tie them down so they sweep back. Trim the wing to length.
- 7
Step 7
Spin the bobbin to untwist the thread so it lies flat, then open the strands with a thread splitter.
- 8
Step 8
Tuck a small amount of Arizona Synthetic Dubbing into the split thread and spread it evenly along the opening.
- 9
Step 9
Spin the bobbin the other way to close the thread and lock the dubbing into a loose rope.
- 10
Step 10
Wrap the dubbed thread forward to the bead to form the collar and clear any leftover dubbing from the thread.
- 11
Step 11
Whip finish behind the bead and trim the thread.
- 12
Step 12
Tease out the collar and stroke the fibers back along the body.
- 13
Step 13
Add a small touch of head cement to the whip finish with a bodkin.
Watch Tying Tutorial
https://www.youtube.com/watch?v=-e-JdrkGb8c
Credit: Cheech / Fly Fish Food