 Fly Tying Inventory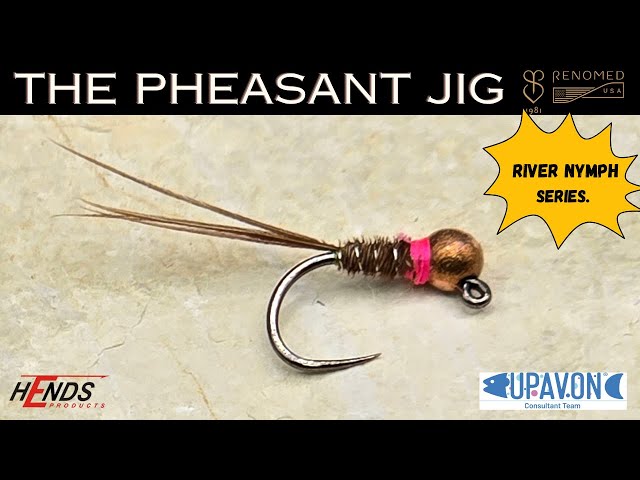
Jig Pheasant Tail (Euro Style)
A Euro-nymphing adaptation of the classic Pheasant Tail Nymph tied on a barbless jig hook with a slotted tungsten bead. The jig hook orientation helps the fly ride point-up to reduce snags, while the heavy bead ensures a rapid sink rate. An optional fluorescent hot spot behind the bead adds visibility and fish-attracting appeal in competition fishing.
🪶 Ready to tie this?
This pattern needs 8 materials. Sign up free to check which ones you already own.
Materials
Barbless jig hook (Hanak H400BL, Umpqua C400BL), sizes 12-18
Slotted tungsten bead, 2.5-3.5mm, black or nickel
Brown or fluorescent orange 8/0 (70 denier)
Coq de Leon fibers or pheasant tail fibers, 5-7 strands
Small copper wire
Natural pheasant tail fibers
Squirrel and rabbit dubbing blend (2:1) or peacock herl
Fluorescent orange thread or dubbing collar behind bead
How to Tie the Jig Pheasant Tail (Euro Style)
- 1
Step 1
Slide the slotted tungsten bead onto the jig hook and secure the hook in the vise with the bead at the eye.
- 2
Step 2
Start the thread behind the bead and lay a smooth base back toward the hook bend.
- 3
Step 3
Tie in 5-7 Coq de Leon or pheasant tail fibers at the bend as a tail, about one hook gap in length.
- 4
Step 4
Tie in a length of small copper wire along the top of the shank for ribbing.
- 5
Step 5
Tie in 4-6 pheasant tail fibers by their tips behind the bead. Wrap rearward then forward to form a slim, tapered body.
- 6
Step 6
Counter-wrap the copper wire ribbing over the body to reinforce and segment. Secure and break off behind the bead.
Keep the body slim for a faster sink rate—essential for Euro nymphing.
- 7
Step 7
Dub a small thorax with squirrel/rabbit blend or wrap peacock herl just behind the bead, sweeping fibers rearward to suggest legs.
- 8
Step 8
Build a visible hot spot collar with fluorescent orange thread or dubbing directly behind the bead.
- 9
Step 9
Whip finish and apply a drop of head cement for durability. Optionally brush out the thorax fibers with a dubbing brush.
Watch Tying Tutorial
https://www.youtube.com/watch?v=3RX79ld6Vy4
Credit: Euro Nymphing Tradition