 Fly Tying Inventory
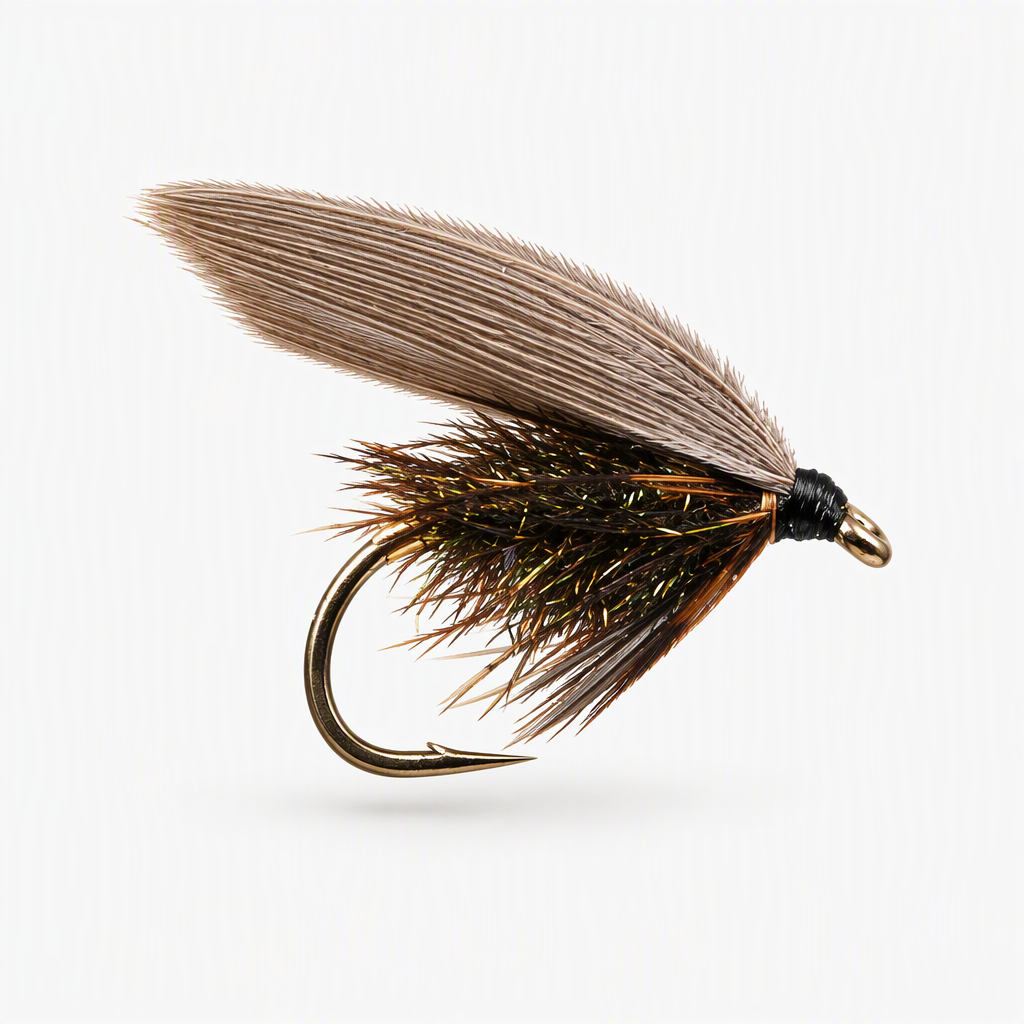
Leadwing Coachman
The Leadwing Coachman is a member of the old English Coachman family, with a slate-gray duck quill wing in place of the original white one, which is where the name comes from. A gold tag, a fat peacock herl body and a soft brown hackle give it the dark, buggy look of an Isonychia (slate drake) nymph, and it also does well when dark caddis are hatching. Fish it in the traditional way, swung across and down on a tight line, or as part of a two- or three-fly wet fly rig.
Ready to tie this?
This pattern needs 7 materials. Sign up free to check which ones you already own.
Materials
Standard dry fly hook, sizes 10-14 (Dai-Riki 305 in the video)
10-14
6/0 (140 denier) thread, black
Black · 6/0
Flat tinsel, gold/silver, medium (tag)
Gold · Medium
Fine wire, gold
Gold · Fine
Peacock herl, several strands
Natural
Hen hackle, speckled brown
Speckled Brown
Mallard wing quill segments, slate gray, one matched left and right pair
Slate Gray
How to Tie the Leadwing Coachman
- 1
Step 1
Start the thread a little behind the eye and lay a smooth base back to the point where the bend begins.
- 2
Step 2
Tie in the flat tinsel at the bend, wrap a few touching turns down onto the start of the bend and then back up over them to make a short, bright tag. Tie it off and trim it, keeping the gold side out.
- 3
Step 3
Tie in the gold wire just in front of the tag and secure it along the shank.
- 4
Step 4
Tie in several peacock herl strands by their tips, twist them with the thread into a rope and wrap a full body forward, stopping about a fifth of the shank short of the eye to leave room for the hackle and wing. Tie off and trim.
Twisting the herl around the thread makes the body far tougher against trout teeth.
- 5
Step 5
Counter-wrap the wire forward through the herl in four or five open turns, tie it off and break off the excess.
- 6
Step 6
Strip the fluff from a speckled brown hen feather, tie it in by the tip in front of the body and wrap two or three turns. Tie it off, clip the stem and stroke the fibres back and down so the top of the hook is clear for the wing.
- 7
Step 7
Cut a matching segment, about a hook gap wide, from a left and a right mallard wing quill. Put them together with the dull sides facing each other so the tips curve down, and check the length reaches the back of the bend.
- 8
Step 8
Set the paired wing on top of the shank and hold it there with a couple of soft pinch wraps, pulling straight down so the fibres stack instead of rolling. Check that it sits upright and centred, add a few firmer wraps, then trim the butts.
If the wing splits or leans, unwind and try again before adding the firm wraps; quill wings rarely improve once they are locked down.
- 9
Step 9
Cover the trimmed butts with a small, neat head and whip finish.
Watch Tying Tutorial
https://www.youtube.com/watch?v=jbs9QE9wXfM
Credit: Tim Flagler / Tightline Productions