 Fly Tying Inventory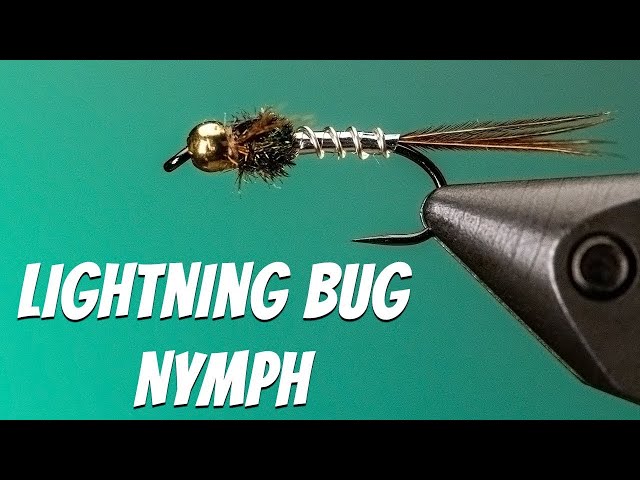
Lightning Bug
A flashy attractor nymph that blends natural pheasant tail with reflective tinsel and peacock herl. The Lightning Bug's combination of flash and natural materials makes it especially effective in off-color water and as a prospecting fly. A staple pattern for anglers who need a reliable fish-finder in their nymph box.
🪶 Ready to tie this?
This pattern needs 10 materials. Sign up free to check which ones you already own.
Materials
2X-heavy nymph hook (TMC 3769 or equivalent), sizes 14-18
Silver or gold tungsten bead, 7/64" for size 14-16
White or camel 8/0 (70 denier)
Lead-free wire, .015 diameter
Natural pheasant tail fibers, 5-6 strands
Small silver or copper wire
Medium pearl or holographic Mylar tinsel
Opal Mirage or pearl tinsel
Peacock herl, 2 strands
Natural pheasant tail fibers or hen back fibers
How to Tie the Lightning Bug
- 1
Step 1
Place the bead on the hook and secure in the vise. Optionally wrap 4-5 turns of lead-free wire behind the bead for added weight.
- 2
Step 2
Start the thread behind the bead and lay a smooth foundation back to the hook bend.
- 3
Step 3
Tie in 5-6 pheasant tail fibers at the bend for the tail, about one hook shank in length. Trim excess.
- 4
Step 4
Tie in the silver wire rib along the near side of the hook shank.
- 5
Step 5
Tie in the pearl tinsel for the body and wrap forward to just behind the bead in smooth, even turns. Secure and trim.
- 6
Step 6
Counter-wrap the ribbing wire forward over the tinsel body in evenly spaced turns. Tie off behind the bead and trim.
Counter-wrapping adds durability and a segmented look.
- 7
Step 7
Tie in a strip of opal or pearl tinsel for the wing case, positioned just behind the bead.
- 8
Step 8
Tie in 2 peacock herls by their tips and wrap to form a pronounced, buggy thorax behind the bead. Tie off and trim.
- 9
Step 9
Fold 3-4 pheasant tail fibers on each side of the thorax for legs, extending just past the thorax. Secure and trim butts.
- 10
Step 10
Pull the wing case material over the thorax, secure with thread wraps behind the bead, and trim excess.
- 11
Step 11
Whip finish behind the bead and apply head cement or UV resin to the thread wraps and wing case.
Watch Tying Tutorial
https://www.youtube.com/watch?v=3k7t6chv2DA
Credit: Traditional / Larry Graham