 Fly Tying Inventory
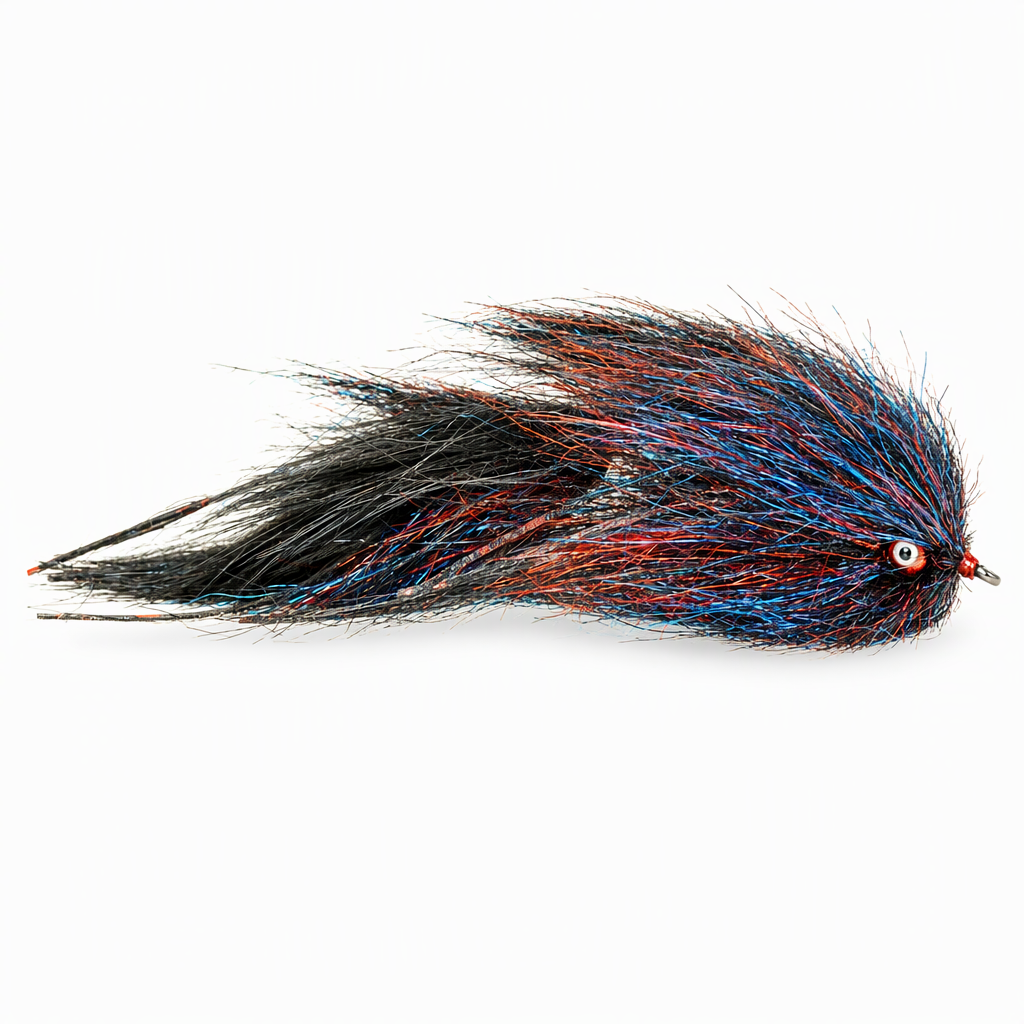
Low Brow Articulated
Cheech of Fly Fish Food worked out the Low Brow while making a batch of black, red and blue dubbing brushes, a color mix known as Midnight Fire. It is a two-hook articulated streamer with a more neutral balance than the Street Sweeper, so it sinks more slowly. Two kinds of brush build the body, while rabbit strips, silicone legs and BallZeyes at the head change how it moves in the water. Tied here on a size 1 rear hook and a size 1/0 front hook.
Ready to tie this?
This pattern needs 15 materials. Sign up free to check which ones you already own.
Materials
Fulling Mill FM6040 Streamer Stripper, size 1, rear hook (or Gamakatsu B10S, size 1)
1
Fulling Mill FM6040 Streamer Stripper, size 1/0, front hook (or Gamakatsu B10S, size 1/0)
1/0
Rabbit Zonker Strips, black, for the tail and back of each section
Black
Ice Dub, red, for both dubbing brushes
Red
Ice Dub, Blue Steelie, for both dubbing brushes
Blue Steelie
Ice Wing Fiber, black, cut to 2 inch lengths for the rear section brush
Black
Loon Fluorescing UV Clear Fly Finish, for the heads
BallZeyes, anodized red with white eye, large (3/16 inch, 5mm)
Anodized Red · Large
Senyo Intruder Trailer Hook Wire, black, regular, for the connection between the sections
Black · Regular
Fly Tyer's Z-Ment, for the wraps on the front hook
How to Tie the Low Brow Articulated
- 1
Step 1
Before you sit down to tie, make two dubbing brushes from red and Blue Steelie Ice Dub. Add black Ice Wing Fiber cut to 2 inch lengths to one brush and black Extra Select Craft Fur to the other.
The fly ties quickly when several brushes are made in advance.
- 2
Step 2
Mount the rear hook and start the red thread on the shank. Wrap back to the start of the bend.
- 3
Step 3
Tie in a black rabbit strip at the start of the bend so a tail trails behind the hook. Fold the long front end of the strip back out of the way.
- 4
Step 4
Tie in the Ice Wing brush at the same point and wrap it forward to just behind the hook eye, stroking the fibers back as you go. Tie it off and trim the wire.
- 5
Step 5
Tie in the black silicone legs at the front of the brush so they trail back along the sides. Trim the waste.
- 6
Step 6
Pull the rabbit strip forward over the top of the brush and tie it down behind the hook eye. Trim the excess hide.
- 7
Step 7
Whip finish, coat the head with Loon UV finish and cure it. Take the finished rear section out of the vise.
- 8
Step 8
Mount the front hook and start the red thread. Tie the BallZeyes onto the shank a short way behind the hook eye and secure them firmly.
- 9
Step 9
Wrap the lead wire along the shank behind the eyes in touching turns, then lock the coil in place with thread.
- 10
Step 10
Slide the 3D articulation bead onto the trailer wire and pass the wire through the eye of the rear section. Lash both ends of the wire along the shank so the bead sits at the back of the shank and the rear section swings freely, then coat the wraps with a thin glue such as Z-Ment.
- 11
Step 11
Tie in a second rabbit strip at the back of the front shank, with a tail lying over the rear section and the long end folded back out of the way.
- 12
Step 12
Tie in the craft fur brush at the back of the shank and wrap it forward to just behind the eyes, then tie in the legs as you did on the rear hook. Pull the rabbit strip forward over the top, tie it down behind the eyes and trim the excess.
- 13
Step 13
Tie in a fresh length of the craft fur brush behind the eyes and wrap it forward past them to the hook eye, combing the fibers back as you go. Tie it off and trim the wire.
- 14
Step 14
Trim away any fibers that cover the eyes. Whip finish, coat the head with UV finish and cure it.
Watch Tying Tutorial
https://www.youtube.com/watch?v=-jkJ30PMhoA
Credit: Cheech / Fly Fish Food