 Fly Tying Inventory
Mallard and Claret
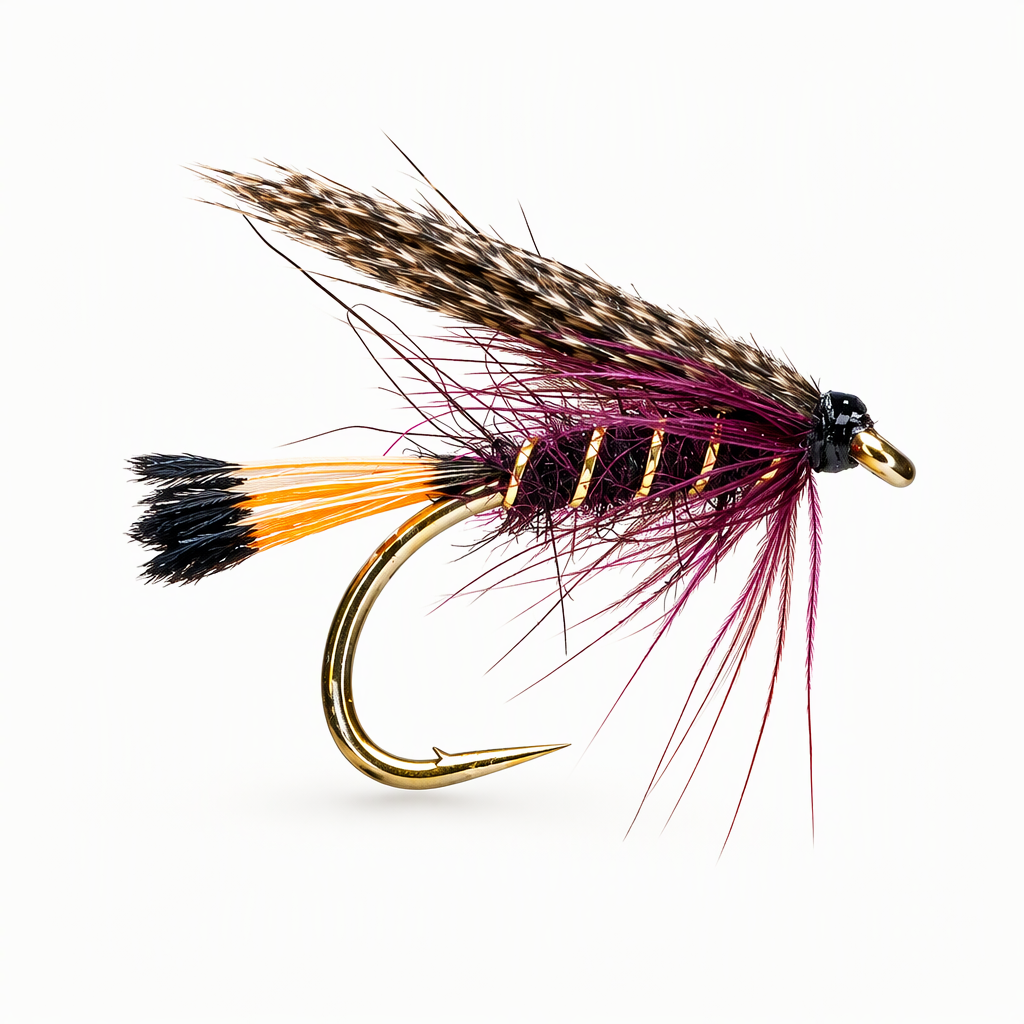
The Mallard and Claret is a classic, reliable winged wet fly for hill lochs. It has a golden pheasant tippet tail, a dubbed claret body ribbed with fine gold oval tinsel, a claret hen hackle and a wing of bronze mallard. This version uses Fulling Mill Seal X Dub for the body. The body, rib and hackle go on first, and the mallard wing is tied in last on top of the hook. Tied here on a size 12 Fulling Mill FM5090 Comp Heavyweight hook.
Ready to tie this?
This pattern needs 8 materials. Sign up free to check which ones you already own.
Materials
Fulling Mill FM5090 Comp Heavyweight, size 12
12
Semperfli Classic Waxed 12/0, black
Black · 12/0
Golden pheasant tippet fibers
Lagartun Oval French Tinsel X-Strong, fine, gold
Gold · Fine
Fulling Mill Seal X Dub, claret
Claret
Hen hackle, claret
Claret
Bronze mallard
Head varnish
How to Tie the Mallard and Claret
- 1
Step 1
Start the thread behind the eye and wrap a smooth base back to the bend.
- 2
Step 2
Tie in a small bunch of golden pheasant tippet fibers at the bend for the tail. Bind the butts along the shank and trim.
- 3
Step 3
Tie in the fine gold oval tinsel at the bend for the rib, binding the end along the shank to keep the underbody smooth.
- 4
Step 4
Return the thread to the bend. Dub a thin layer of claret Seal X Dub onto the thread and wind it forward to form a slim, slightly tapered body, stopping short of the eye.
- 5
Step 5
Wind the gold rib forward in open, evenly spaced turns. Tie it off and trim the excess.
- 6
Step 6
Prepare a claret hen feather and tie it in by the tip at the front of the body.
- 7
Step 7
Wind a few turns of hen hackle, tie it off and trim the stem. Sweep the fibers back so they lie along the body and leave room on top for the wing.
- 8
Step 8
Cut a section of bronze mallard and fold or pair it so it forms a neat, even wing with the tips together.
- 9
Step 9
Set the mallard on top of the shank so it slopes back over the body, and secure it with a pinch-and-loop wrap. Add a few more firm turns and trim the butts.
- 10
Step 10
Form a small, neat head, whip finish and add a coat of varnish.
Watch Tying Tutorial
https://www.youtube.com/watch?v=8iFJOXfzFI0
Credit: Robert MacDonald-Lewis