 Fly Tying Inventory
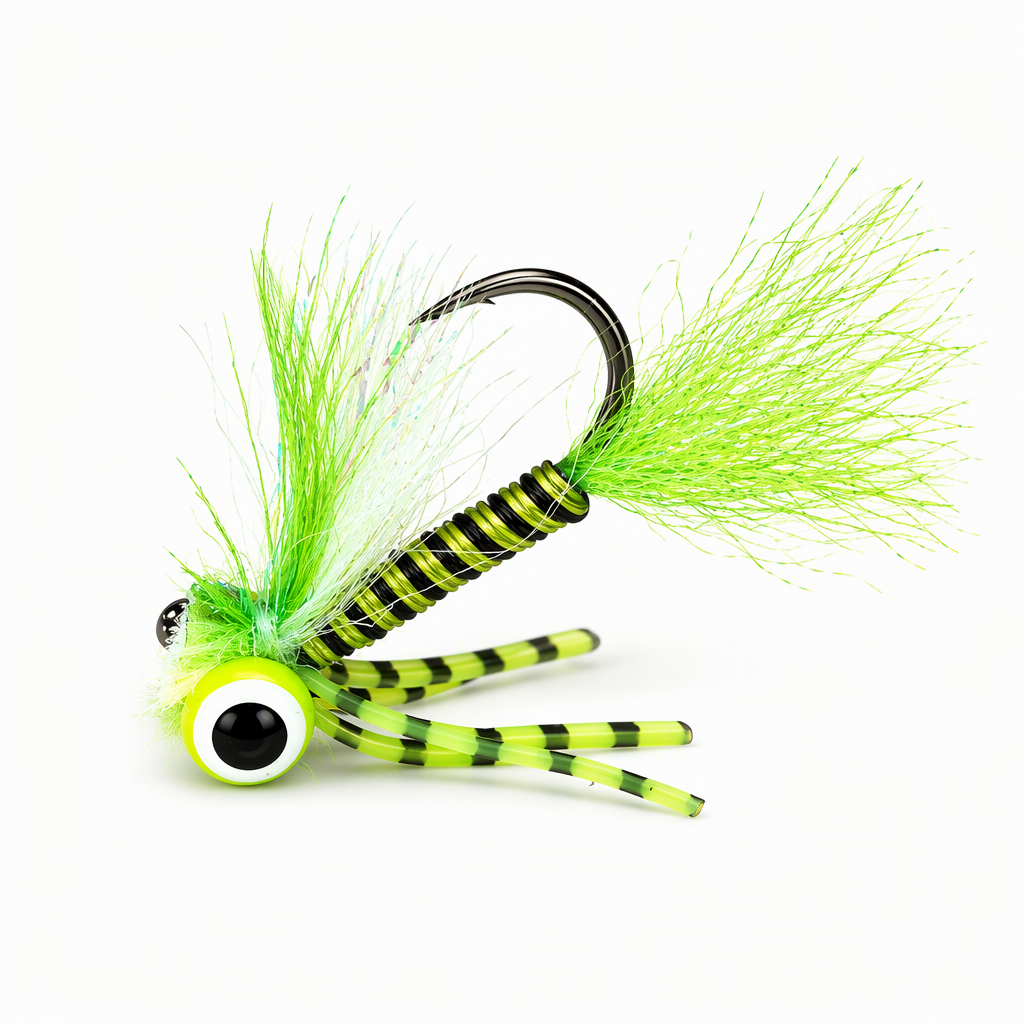
Mata-Crappie
Curtis Fry first tied this wire bodied panfish fly for a crappie and smallmouth trip with Cheech on Brownlee Reservoir, and this is his later revision of it. The wire takes it down quickly while the flutter legs add action. It has since taken white bass, bluegill, carp, largemouth, smallmouth and a few trout. Curtis fishes it under an indicator with slow movement, or on an intermediate or midge tip line, sometimes retrieved vertically just off the bottom. Tied here on a size 10 jig hook.
Ready to tie this?
This pattern needs 11 materials. Sign up free to check which ones you already own.
Materials
Double Pupil Lead Eyes, chartreuse with white and black, extra small
Chartreuse with White and Black · Extra Small
Thin glue, for the eye wraps
UTC Ultra Wire, chartreuse, medium
Chartreuse · Medium
UTC Ultra Wire, black, medium, wrapped beside the chartreuse wire
Black · Medium
Grizzly Flutter Legs, black barred fl. green chartreuse
Black Barred Fl. Green Chartreuse
Loon Fluorescing UV Clear Fly Finish, for coating the wire body
How to Tie the Mata-Crappie
- 1
Step 1
Set the jig hook in the vise and start the thread on the shank near the front of the hook. Build a small base where the eyes will sit.
- 2
Step 2
Tie the lead eyes on top of the shank with firm figure-eight wraps until they stop shifting. Add a small drop of thin glue to the wraps.
- 3
Step 3
Tie in a bunch of EP Trigger Point fibers just behind the lead eyes, with the tips lying back past the bend.
- 4
Step 4
Wrap the thread back over the fibers to the rear of the shank, leaving a smooth underbody. Trim the fibers past the bend for a short tail.
- 5
Step 5
Tie in the chartreuse and black wires together at the base of the tail and bring the thread forward to the eyes.
- 6
Step 6
Wrap both wires forward side by side so the colors make alternating bands. Tie them off behind the lead eyes and trim the excess.
- 7
Step 7
Turn the hook over so the point faces up. Hold a small bunch of chartreuse Ripple Ice Fiber with a bunch of white craft fur and tie them in on the hook point side, behind the lead eyes, with the tips pointing forward past the hook eye. Trim the butts.
- 8
Step 8
Fold the fibers back past the lead eyes and put a few wraps against their base so they sweep back along the body as a throat.
- 9
Step 9
Return the hook to its upright position. Tie a length of flutter legs to each side of the fly, near the front of the body, so the ends flare out.
- 10
Step 10
Trim the legs to length.
- 11
Step 11
Whip-finish and trim the thread.
- 12
Step 12
Coat the wire body with Loon Fluorescing UV Clear Fly Finish and cure it with a UV light.
Watch Tying Tutorial
https://www.youtube.com/watch?v=6S0LdxFLzeQ
Credit: Curtis Fry / Fly Fish Food