 Fly Tying Inventory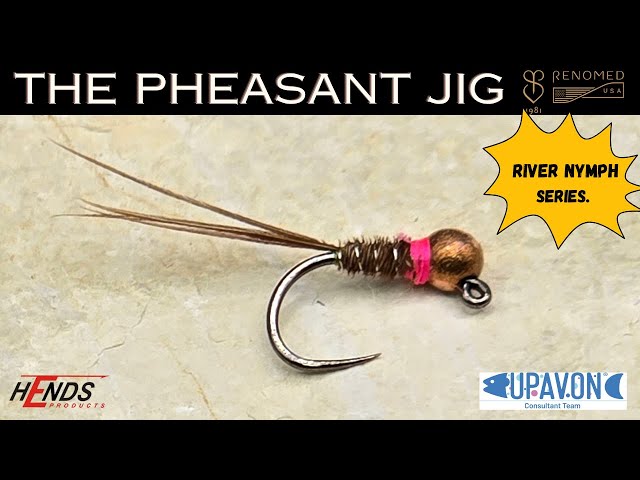
Pheasant Tail Jig (Competition Style)
The competition-style Pheasant Tail Jig takes the classic PTN and adapts it for Euro nymphing with a jig hook, slotted tungsten bead, and fluorescent hotspot collar. The natural pheasant tail body with copper wire rib provides a realistic mayfly nymph profile that sinks quickly and drifts naturally.
🪶 Ready to tie this?
This pattern needs 8 materials. Sign up free to check which ones you already own.
Materials
Barbless jig hook, size 12-16 (e.g., Hanak H 400BL)
Slotted tungsten bead, 2.5-3.5mm, black or gold
Fluorescent orange or pink 8/0 or 70 Denier for hotspot
Coq de León fibers or pheasant tail fibers, 4-6 strands
Fine copper or gold Ultra Wire, small
Pheasant tail fibers, natural or dyed dark brown
Dubbing blend: 2 parts gray squirrel fur, 1 part rabbit dubbing
Bright thread or dubbing collar behind the bead (orange, pink, or chartreuse)
How to Tie the Pheasant Tail Jig (Competition Style)
- 1
Step 1
Place the jig hook in the vise and slide the slotted tungsten bead up to the eye.
- 2
Step 2
Start fluorescent thread behind the bead and wrap back to the hook bend.
- 3
Step 3
Tie in 4-6 Coq de León or pheasant tail fibers for a tail the length of the hook shank.
- 4
Step 4
Tie in fine copper wire on top of the hook shank for ribbing, securing it down past the hook point.
- 5
Step 5
Tie in 4-6 pheasant tail fibers by the tips at the rear. Wrap them up the shank to form a slim, even body. Secure behind the bead.
Wrap fibers tightly for a smooth, segmented appearance.
- 6
Step 6
Counter-wrap the copper wire toward the bead in open, even turns. Tie off and helicopter to break excess wire.
- 7
Step 7
Dub a short, spiky thorax from blended squirrel/rabbit dubbing just behind the bead for a natural buggy effect.
Use the split-thread method for better dubbing control on small hooks.
- 8
Step 8
Build a small, bright thread collar of fluorescent orange or pink just behind the bead for the hotspot.
- 9
Step 9
Whip finish right behind the bead and apply a drop of head cement or UV resin to secure.
Watch Tying Tutorial
https://www.youtube.com/watch?v=3RX79ld6Vy4
Credit: Orvis; Flylords Mag; The Fly Bench