 Fly Tying Inventory
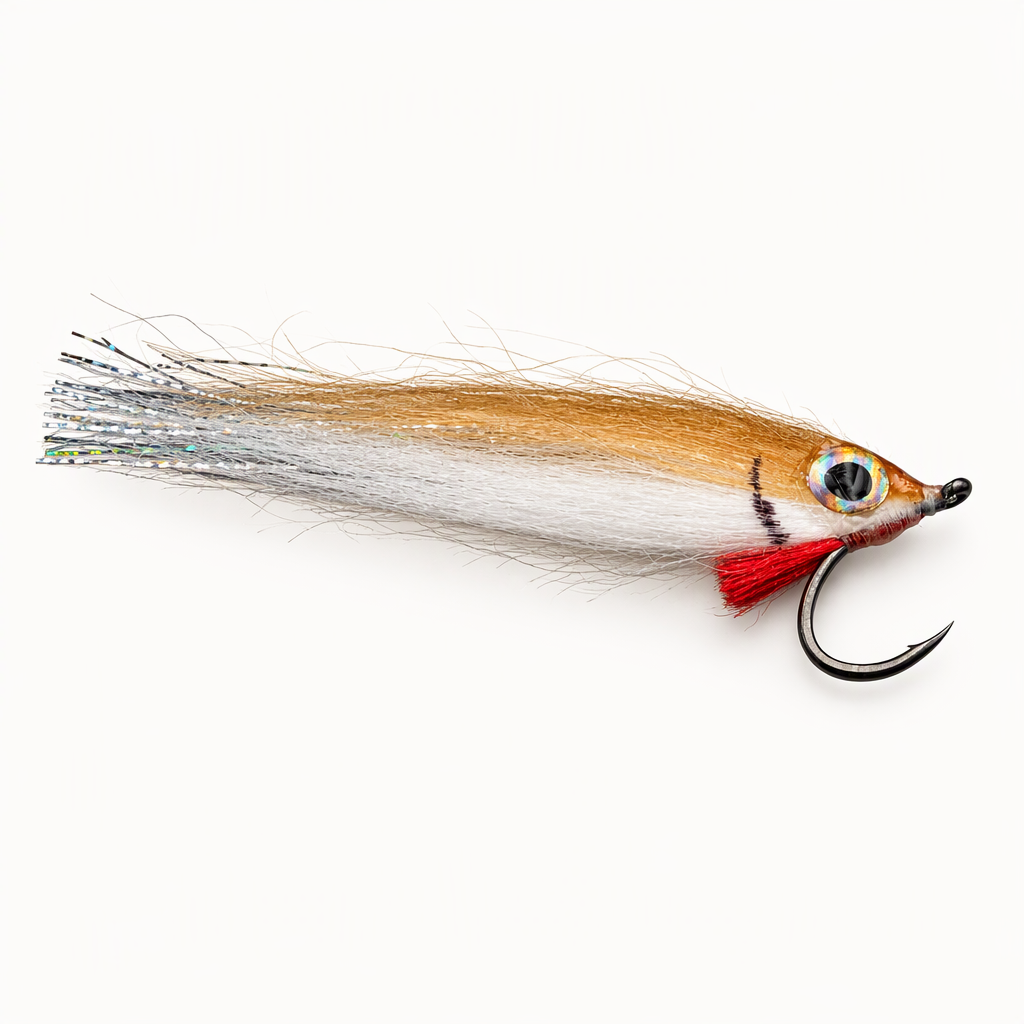
Polar Fibre Minnow
The Polar Fibre Minnow, shown here by Cheech, is a baitfish pattern with a long record in saltwater that also works well for trout. Polar Fibre is a soft, very pliable craft fur, and its natural taper shapes the fly with little trimming. The fly tracks straight and resists fouling around the hook. It does its work at about 2.5 to 4 inches in length, in saltwater and stillwater. Tie it in color combinations that match your local baitfish. Tied here on a size 2 hook, with size 1/0 as an alternate.
Ready to tie this?
This pattern needs 10 materials. Sign up free to check which ones you already own.
Materials
Umpqua XS425 X-Series Hook (BN5X Baitfish Stinger), black, size 2 (or Gamakatsu SC15 Wide Gap, size 1/0)
Black · 2
White tying thread
White
Fly Tyer's Z-Ment, to seal the head and help hold the eyes
Solarez UV Cure Resin - Medium Hard 1/2 oz, for the head
Marker, for the back of the head
How to Tie the Polar Fibre Minnow
- 1
Step 1
Mount the hook and start the thread behind the eye, keeping the wraps toward the front of the shank.
- 2
Step 2
Tie in a small bunch of red Fluoro Fiber just behind the eye for the gills. Trim it short so it sits just behind the head.
- 3
Step 3
Cut a bunch of white Polar Fibre from the hide. Comb out the short underfur and keep the long fibers.
- 4
Step 4
Pull the tips of the bunch to even out the taper, then tie it in on top of the shank behind the eye with the tips trailing well past the bend.
- 5
Step 5
Fold a few strands of Mirage Flashabou around the thread and tie them in on top of the white, trailing back along the body.
- 6
Step 6
Prepare a bunch of camel Polar Fibre the same way, combing it and evening the tips.
- 7
Step 7
Set the camel on top of the fly and use a pinch wrap so it stays on top of the shank instead of rolling to the far side.
Hold the bunch firmly, bring the thread up between your fingers and tighten straight down.
- 8
Step 8
Trim the butts of the fibers, build a neat thread head and whip finish.
- 9
Step 9
Pinch the fibers near the head with flat pliers to narrow the fly side to side.
- 10
Step 10
Work Z-Ment into the fibers at the head and along the sides where the eyes will go. Set a Living Eye on each side and press it into place.
- 11
Step 11
If you want a darker back, add color to the top of the head with a marker before the resin goes on.
- 12
Step 12
Coat the head and eyes with UV resin, turning the fly so it stays even. Cure it with a UV light and add a second coat if needed.
- 13
Step 13
Comb the fibers back, trim any stragglers and check that the fly holds a clean taper.
Watch Tying Tutorial
https://www.youtube.com/watch?v=qd9es-FsJjE
Credit: Cheech / Fly Fish Food