 Fly Tying Inventory
Project Sculpin
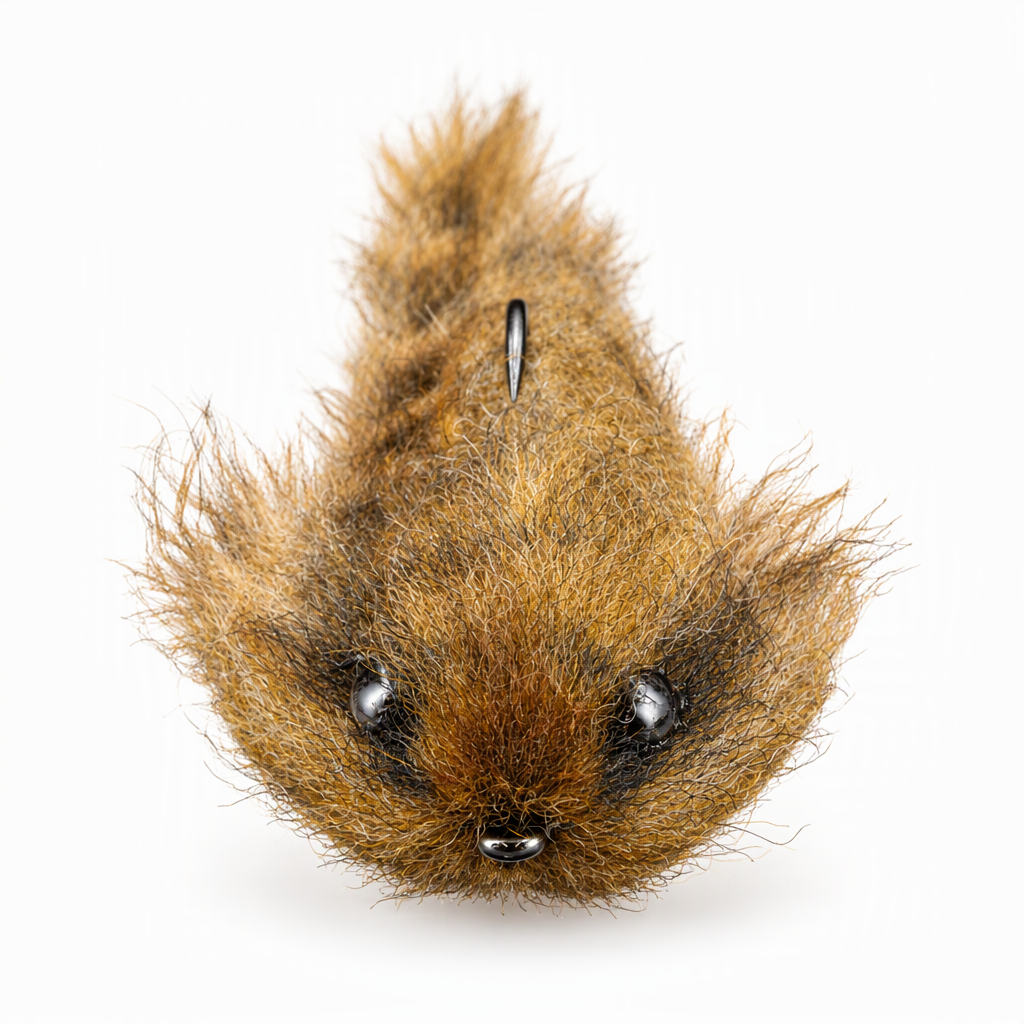
Cheech developed the Project Sculpin while learning to teach wool heads, and it follows the same extra-effort thinking as his Project Hopper, aimed at wary trout. An Ice Dub body, barred rabbit tail and sides, and a trimmed head of four blended Sculpin Wool colors build a lifelike outline, finished with marker barring and resin eyes. Tungsten beads on wire provide the weight, so keep enough of it on board if you change the size. Fish it close to the bottom where trout hunt sculpins. Tied here on a size 1 hook.
Ready to tie this?
This pattern needs 17 materials. Sign up free to check which ones you already own.
Materials
Gamakatsu B10S Stinger hook, size 1 (or Fulling Mill 36040 Streamer Stripper, size 1)
1
210 Denier Waxed Danville Flymaster Plus, tan #369, for the body (or brown #40)
Tan #369 · 210 denier
Ice Dub, gold (or Ripple Ice Dub, gold)
Gold
Senyo Intruder Trailer Hook Wire, regular, gray (or black), to carry the beads
Gray · Regular
Fulling Mill Tungsten Beads, gold, 3.8mm (or Plummeting Tungsten Beads, gold, 5/32")
Gold · 3.8mm
Fulling Mill Big Game Rabbit Zonker Strips, gold grizzly black barred, for the tail and sides (or Magnum Black Barred Rabbit Strips, light brown)
Gold Grizzly Black Barred
Veevus GSP, 150 denier, black #11, for the head (or white #377)
Black #11 · 150 denier
Chartpak fly tying marker, black
Black
Chartpak fly tying marker, Delta Brown (dark brown)
Delta Brown
Red permanent marker, for the gill spot
Red
Fly Tyer's Z-Ment
Solarez UV Cure Resin - Thin Hard 1/2 oz, for the eyes
Solarez UV Cure Resin - Medium Hard 1/2 oz, for the eyes
How to Tie the Project Sculpin
- 1
Step 1
Before going to the vise, blend the head material. Lay tufts of brown, cream and black Sculpin Wool on a larger amount of tan, pull it apart by hand, and brush it on a mat until the colors mix into a mottled blend.
- 2
Step 2
Mount the hook and start the tan thread at the rear of the shank.
- 3
Step 3
Form a dubbing loop, spin gold Ice Dub into a rope, and wrap a short section at the rear of the shank.
- 4
Step 4
Tie in the Senyo wire just ahead of the Ice Dub, then add another section of Ice Dub in front of the tie-in point with the wire left free.
- 5
Step 5
Slide the tungsten beads onto the wire, bring the wire forward along the side of the shank away from the point, and lash it down. Trim the excess wire and pick the Ice Dub fibers back toward the bend.
Keep enough weight here for the size you tie, since it decides how the fly swims.
- 6
Step 6
Cut a length of barred rabbit strip and tie it in ahead of the Ice Dub so the fur runs past the bend as the tail.
- 7
Step 7
Tie more of the rabbit strip along each side so the hide runs along the flank and the fur fans out over the body. Trim the hide ends and whip off the tan thread.
- 8
Step 8
Start the Veevus GSP in front of the rabbit. Take a pinch of the wool blend and tie it in by the middle on top of the shank, so the fibers stick out both forward and back.
- 9
Step 9
Pull the forward fibers back with your fingers and take a few wraps in front to hold them. Repeat with a pinch on the underside of the shank.
- 10
Step 10
Keep adding small pinches on top and bottom, working forward to the eye, until the head is full. Whip finish.
- 11
Step 11
Trim the wool to a broad, flat sculpin head. Trim small amounts and check the outline often.
- 12
Step 12
Color the top of the head with Delta Brown and black marker, adding dark bars back along the sides. Add a red spot at the gills if you like.
- 13
Step 13
Color a black spot with the marker on each side of the head where the eyes will sit, then dab Z-Ment onto the wool there.
- 14
Step 14
Build an eye on each side with Thin Hard resin and cure it. Finish with a dome of Medium Hard resin and cure again.
Watch Tying Tutorial
https://www.youtube.com/watch?v=nOBMkgUX3hE
Credit: Cheech / Fly Fish Food