 Fly Tying Inventory
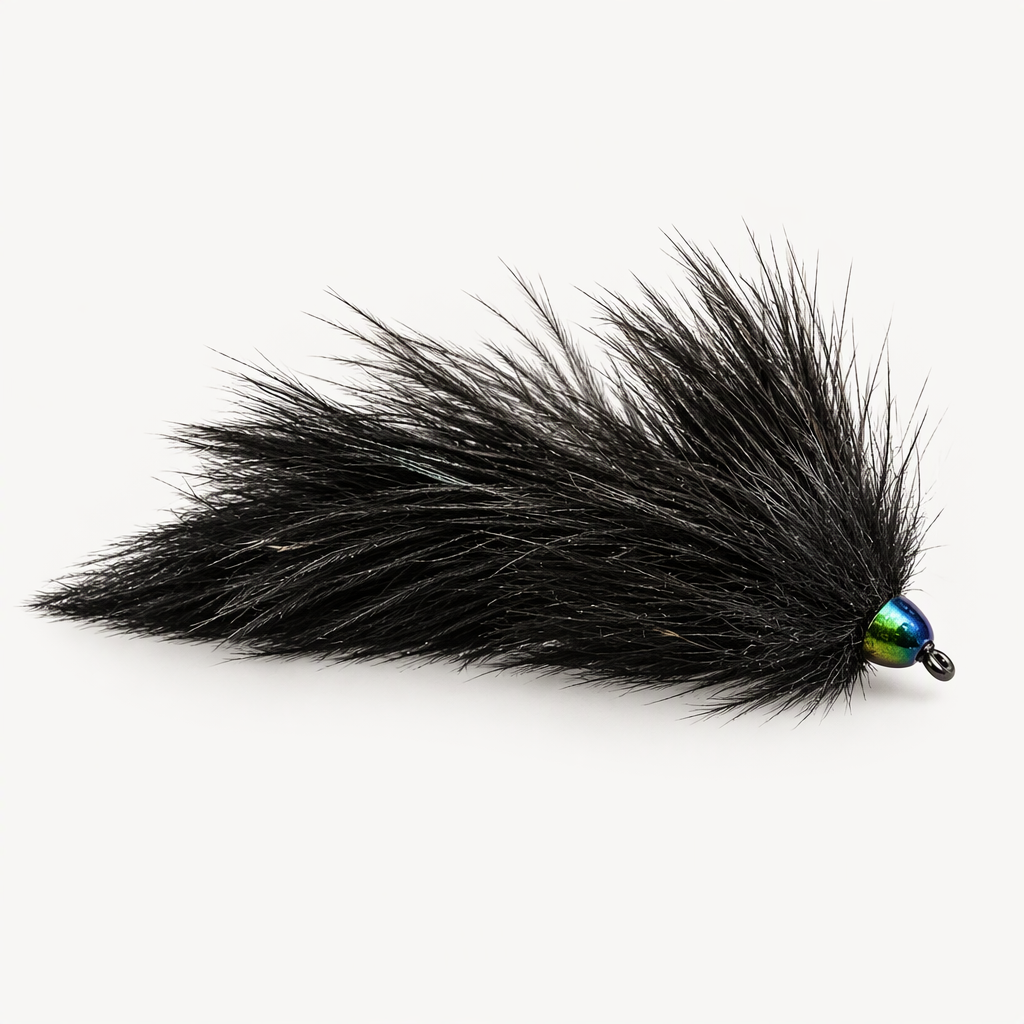
Rippin' Rooster
Brig's Rippin' Rooster is an articulated black streamer for stillwater and rivers, developed on Strawberry Reservoir after long days of follows without takes. Lance Egan suggested changing the fly's direction just as a fish closed in, and Brig built this fly to do that with less line movement. Schlappen over a pair of articulated shanks moves on very little input, so a short pause followed by one hard strip is enough to draw a strike. It has fished well in Utah, Idaho and Montana. Tied here on a size 1 front hook.
Ready to tie this?
This pattern needs 13 materials. Sign up free to check which ones you already own.
Materials
Fulling Mill Bonio Barbless Carp Hook 32500, size 10, for the back hook (or Gamakatsu C14S Glo Bug Hook, size 6)
10
Danville Flat Waxed Nylon 210D, black (or Semperfli Classic Waxed Thread 6/0, black)
Black · 210 denier
Fulling Mill Micro Rabbit Zonker Strips, black (or Micro Rabbit Strips, black)
Black
Schlappen, black (or Fish Hunter Select Schlappen, black UV)
Black
Fish-Skull Next Generation Articulated Shanks, 15mm, for the first articulation
15mm
Fish-Skull Next Generation Articulated Shanks, 20mm, for the second articulation
20mm
Rainbow Brass Cones, 1/4" (6.3mm), for the cone (or Brass Cone Heads, large 1/4", black nickel)
1/4"
Fulling Mill Micro Rabbit Zonker Strips, black (or Micro Rabbit Strips, black)
Black
Fly Tyer's Z-Ment, for securing the wraps
How to Tie the Rippin' Rooster
- 1
Step 1
Clamp the back hook in the vise and start the thread on the shank.
- 2
Step 2
Tie in a length of micro rabbit strip on the shank with the fur trailing past the hook. Trim the excess strip. Turn the hook over in the vise and tie in a second length on the other side of the shank, so the hook sits between the two strips.
- 3
Step 3
Tie in a black schlappen feather in front of the tail. Wrap it forward as a collar, tie it off and trim the excess, then whip finish behind the eye.
- 4
Step 4
Connect the 15mm shank to the eye of the back hook and start the thread on the shank.
- 5
Step 5
Tie in a schlappen feather at the rear of the shank and wrap it forward, stroking the fibers back with each turn. Tie it off, trim and whip finish.
- 6
Step 6
Connect the 20mm shank to the front of the 15mm shank and dress it with schlappen in the same way. Whip finish and set the rear section aside.
- 7
Step 7
Slide the cone onto the front hook and clamp the hook in the vise. Start the thread behind the cone.
- 8
Step 8
Make a few wraps of lead wire on the shank and push them up into the back of the cone to hold it in place. Cover the lead with thread.
- 9
Step 9
Tie the red wire in along the hook shank, then pass it through the red bead and the eye of the rear section, and back through the bead.
- 10
Step 10
Bind the wire ends down along the shank so the rear section hangs behind the hook on a short wire loop, with the bead acting as a spacer. Trim the excess wire.
- 11
Step 11
Tie in a schlappen feather at the rear of the front hook shank and wrap it forward. Tie it off and trim the excess.
- 12
Step 12
Tie in a length of micro rabbit strip in front of the schlappen and wrap it as a collar up to the cone, stroking the fur back with each turn. Tie it off and trim the excess.
- 13
Step 13
Whip finish behind the cone, cut the thread and add a little Z-Ment to the wraps.
- 14
Step 14
Brush out the fur and schlappen so the sections blend together.
Watch Tying Tutorial
https://www.youtube.com/watch?v=bcwAfOn26lY
Credit: Brig / Fly Fish Food