 Fly Tying Inventory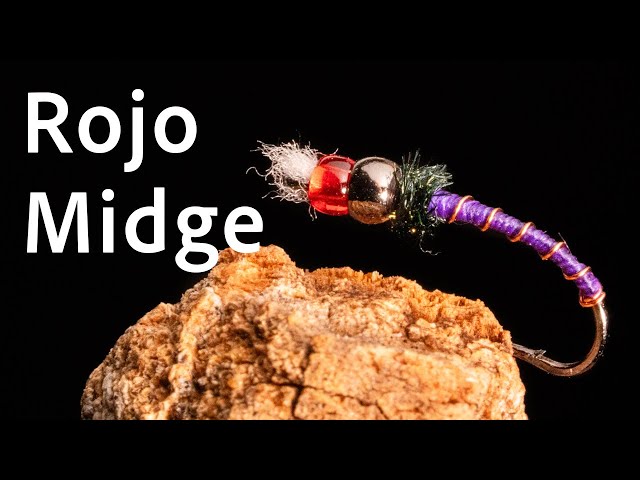
Rojo Midge
Greg Garcia's Rojo Midge is a vibrant, eye-catching midge pupa pattern that stands out for its red glass bead, bright wire rib, white gill tuft, and peacock herl collar. The red color imitates the higher hemoglobin levels found in midge pupae. A simple yet highly effective pattern for both tailwaters and stillwaters, it's become a staple in fly boxes across the West.
🪶 Ready to tie this?
This pattern needs 7 materials. Sign up free to check which ones you already own.
Materials
TMC 200R or similar curved midge hook, sizes 16-22
X-small red glass bead
Red 8/0 or 70 Denier (olive, black, or purple for variants)
White Ultra-Floss, Antron yarn, or Sparkle Yarn
Fine chartreuse, red, silver, or copper wire
Tying thread in body color (red, olive, black, etc.)
Peacock herl, 1-2 strands
How to Tie the Rojo Midge
- 1
Step 1
Flatten the barb and slide the red glass bead onto the hook. Place the hook in the vise.
- 2
Step 2
Start thread behind the hook eye. Brush out the end of a small chunk of white Ultra-Floss and tie it in behind the eye, creating a short gill tuft.
- 3
Step 3
Trim the butt of the floss, whip finish, and cut the thread.
- 4
Step 4
Slide the bead forward over the thread wraps and gill material to sit snugly behind the eye.
The gill tuft should stick out in front of or slightly past the bead for visibility.
- 5
Step 5
Re-attach the thread behind the bead and tie in a fine piece of wire for the rib.
- 6
Step 6
Wrap thread smoothly down the shank to the bend, then back to the bead, forming a slim, slightly tapered body.
- 7
Step 7
Spiral wrap the wire forward to create evenly spaced ribbing. Tie off and break away excess wire.
- 8
Step 8
Tie in 1-2 strands of peacock herl behind the bead. Make several wraps to create a short collar/thorax. Tie off and trim excess herl.
- 9
Step 9
Whip finish behind the bead. Trim gill tuft to a short, visible length.
Watch Tying Tutorial
https://www.youtube.com/watch?v=2Wc5ukAV7Ko
Credit: Greg Garcia