 Fly Tying Inventory
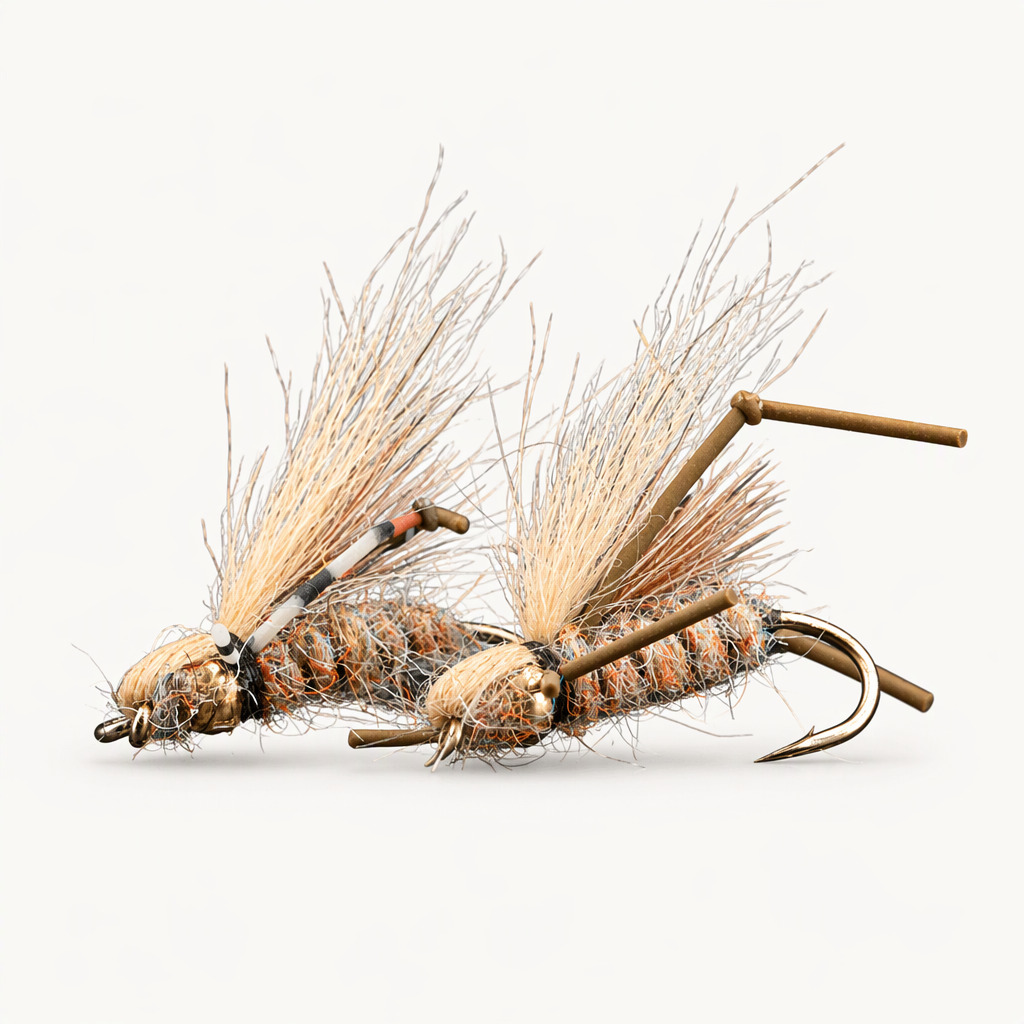
Scuba Hopper
Cheech came up with the Scuba Hopper in 2008 on water where brown trout got wise to the usual presentations. When they inspected the dry and refused it, a sunken hopper started bringing those window shoppers to hand. A gold bead and lead wire sink it, a dubbed body with a Flex-Floss rib and pheasant tail wing give it the hopper shape, and a craft fur head and centipede legs finish it. It works as a problem solver more than a first choice. Tied here on a size 10 hook.
Ready to tie this?
This pattern needs 10 materials. Sign up free to check which ones you already own.
Materials
Fulling Mill Tungsten Beads, gold, 3.8mm (or silver)
Gold · 3.8mm
Lead wire, .020 inch, for the underbody (or lead free round wire)
.020 inch
Fulling Mill Flex-Floss, brown (or black)
Brown
Fulling Mill Ultra Nymph Dub, tan (or Psychedelic Tan)
Tan
Ringneck pheasant tail, natural (or brown)
Natural
Speckled Centipede Legs, medium, yellow/black/red, for the back legs (or Speckled Red)
Yellow/Black/Red · Medium
Speckled Centipede Legs, medium, Speckled Clear Tan, for the front legs (or Speckled Tan/Brown)
Speckled Clear Tan · Medium
How to Tie the Scuba Hopper
- 1
Step 1
Slide the bead onto the hook and mount the hook in the vise.
- 2
Step 2
Wrap lead wire along the shank and push the wraps up against the back of the bead.
- 3
Step 3
Start the thread behind the lead and wrap over it to lock it in place, ending at the bend.
- 4
Step 4
Tie in the brown Flex-Floss at the bend and let it trail behind the hook.
- 5
Step 5
Dub the thread with the Ultra Nymph Dub and wrap a body forward to just behind the bead.
- 6
Step 6
Spiral the Flex-Floss forward over the dubbing in open wraps, tie it off behind the bead, and trim.
- 7
Step 7
Tie a bunch of pheasant tail fibers on top behind the bead for a wing, with the tips reaching back past the bend. Trim the butts.
- 8
Step 8
Tie a yellow, black and red leg in behind the bead on each side with the long end pointing forward past the eye. Fold each leg back along the body, tie it down behind the bead and leave it trailing past the bend.
- 9
Step 9
Bring the thread ahead of the bead and tie in a bunch of craft fur behind the eye with the tips reaching forward past the eye. Trim the butts.
- 10
Step 10
Dub the thread and wrap around the base of the fur and over the bead, ending with the thread behind the bead.
- 11
Step 11
Fold the craft fur back over the bead and bind it down behind the bead to form the head, with the fur flowing back over the wing.
- 12
Step 12
Tie the Speckled Clear Tan legs in behind the head, one along each side, angled forward.
- 13
Step 13
Whip finish behind the head and cut the thread.
- 14
Step 14
Trim all of the legs to length.
Watch Tying Tutorial
https://www.youtube.com/watch?v=yB9MKWEo_sc
Credit: Cheech / Fly Fish Food