 Fly Tying Inventory
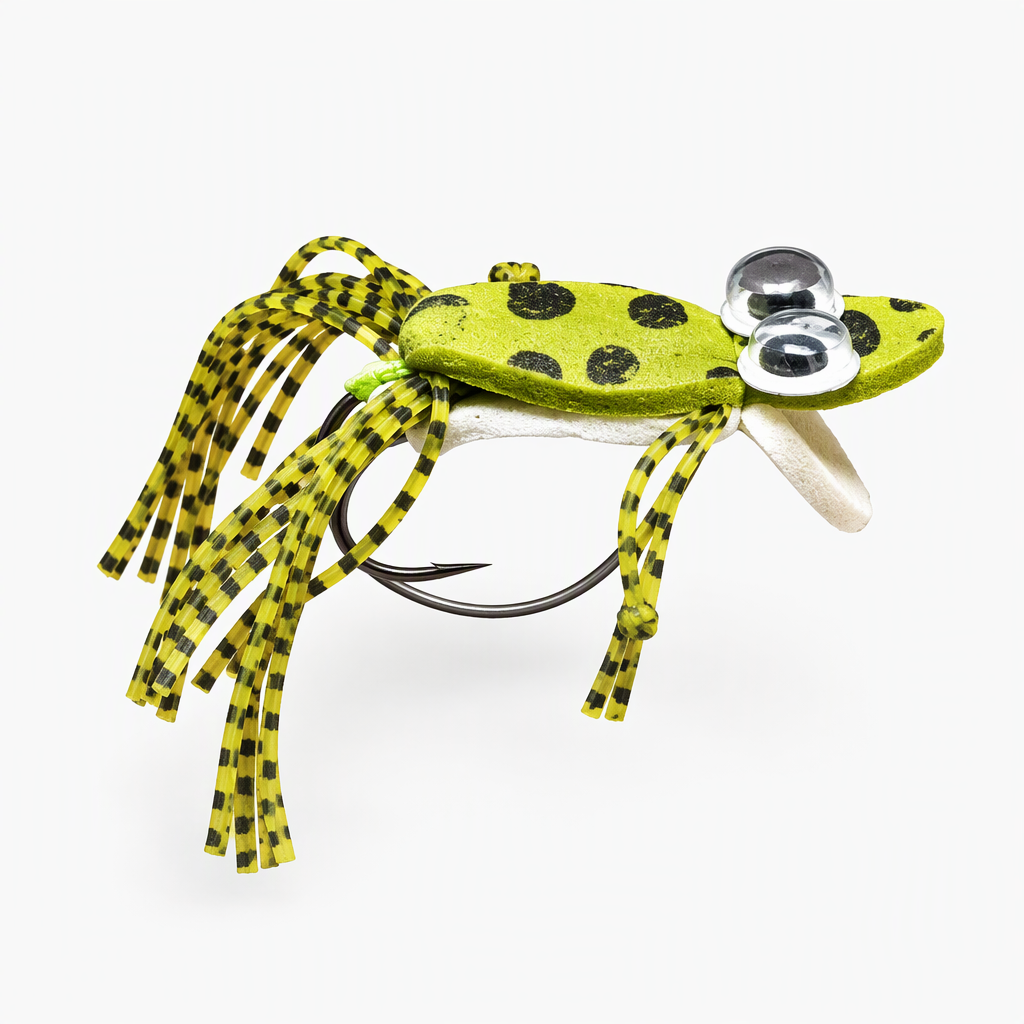
STP Frog
The STP Frog is a simple foam frog for summer bass fishing. The body is two layers of 2mm foam in different colors, cut to a frog outline with the River Road Creations STP frog foam cutters, which Tony Tomsu designed with River Road. A tab of rubber legs goes between the layers, a loop of 30 lb mono protects the point from weeds, and the two layers are glued together at the end. Craft-store rattle eyes are optional. Tied here with a white belly and a spotted green back on a size 2 hook.
Ready to tie this?
This pattern needs 7 materials. Sign up free to check which ones you already own.
Materials
Semperfli fluoro waxed thread, 8/0
8/0
2mm foam in two colors, one for the belly and one for the back
2mm
Rubber legs, one tab
Monofilament, 30 lb, for the weed guard
30 lb
Glue, to join the belly and back layers
Rattle eyes from a craft store
How to Tie the STP Frog
- 1
Step 1
Cut a frog body from each color of 2mm foam with the STP cutters, one for the belly and one for the back.
The cutters give the same outline in both colors, so the belly and back line up when they come together.
- 2
Step 2
Mount the hook and start the thread, covering the shank with a thread base.
- 3
Step 3
Tie both foam pieces to the shank, the belly color underneath and the back color on top.
- 4
Step 4
Tie the tab of rubber legs across the shank so the strands stick out to the sides as arms and legs.
- 5
Step 5
Fold the foam over the shank and bind it down to form the body, belly below and back on top, with the legs coming out between the layers.
- 6
Step 6
Tie in a length of 30 lb mono and form a loop in front of the hook point for the weed guard.
- 7
Step 7
Whip finish and trim the foam and legs to shape.
- 8
Step 8
Glue the belly and back layers together and let the glue set.
- 9
Step 9
Glue a rattle eye on each side of the head if you want eyes.
Watch Tying Tutorial
https://www.youtube.com/watch?v=XqGGX_ntDe8
Credit: Svenddiesel