 Fly Tying Inventory
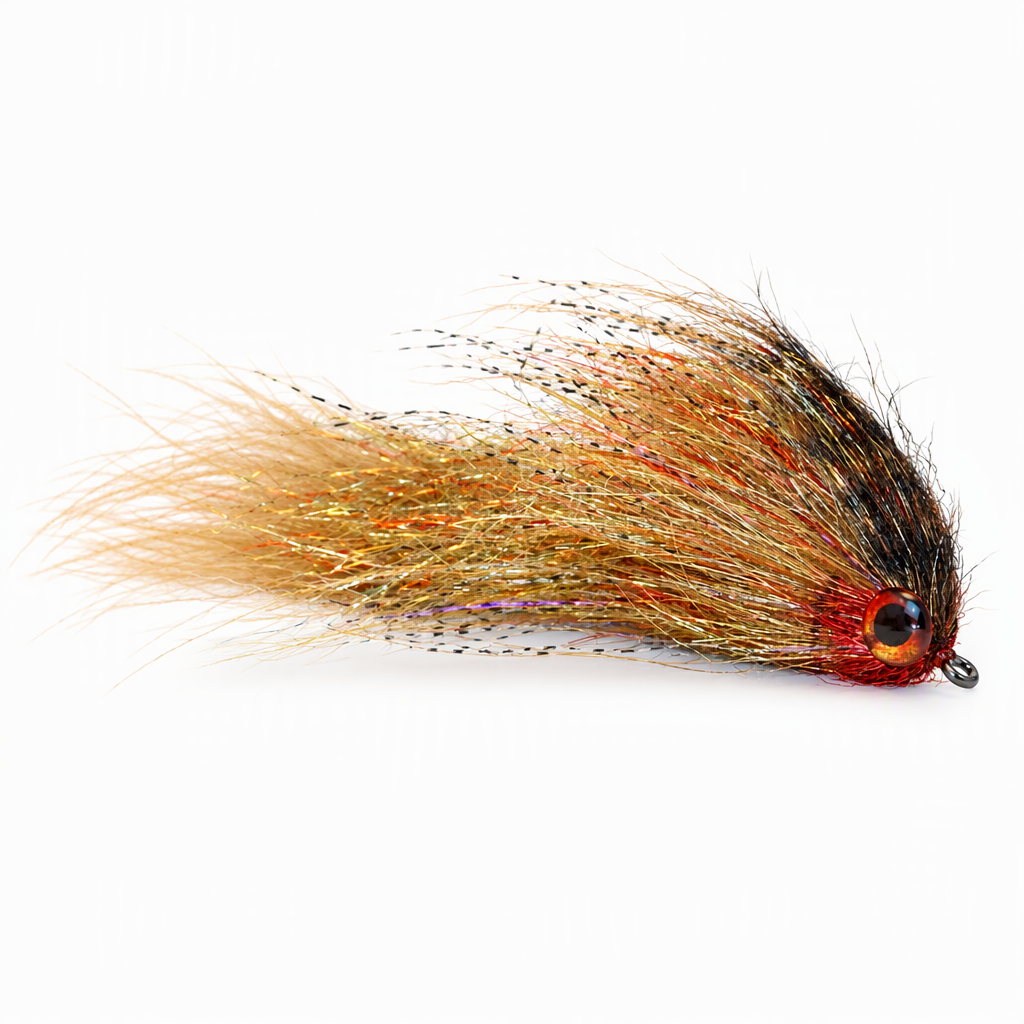
Street Sweeper
A flash-heavy articulated streamer from Cheech of Fly Fish Food, built almost entirely from dubbing brushes. Its gold and red Ice Dub body goes against the common advice to use flash in moderation, and it moves well through the water. A tan marabou tail and a tan craft fur collar keep the fly soft, and barred predator wrap fibers add mottling. Marker, adhesive and eyes finish the head. Make up several brushes before you start tying. Tied here on size 1 and 1/0 hooks.
Ready to tie this?
This pattern needs 18 materials. Sign up free to check which ones you already own.
Materials
Danville Flat Waxed Nylon Thread, 140 denier, white
White · 140 denier
Ice Dub, gold, in both dubbing brushes
Gold
Ice Dub, red, in both dubbing brushes
Red
Articulated Fish Spines shank, 15mm, for the middle section
15mm
Senyo Intruder Trailer Hook Wire, black, regular, for the connection to the front hook
Black · Regular
Gold beads on a short length of wire, for belly weight
Senyo's Barred Predator Wrap, barred UV, fibers cut from the stem, in the collar brush
Barred UV
Chartpak fly tying marker, black
Black
Chartpak fly tying marker, Delta Brown (dark brown)
Delta Brown
Permanent marker, red, for the throat
Tear Mender Waterproof Adhesive (6 oz), for the head
Loon Fluorescing UV Clear Fly Finish
How to Tie the Street Sweeper
- 1
Step 1
Before you sit down to tie, make two dubbing brushes. The first is plain gold and red Ice Dub. The second adds tan craft fur and Predator Wrap fibers cut off the stem, both laid on sparsely.
One whole length of Predator Wrap is enough for a 15 inch brush. Making several brushes at once saves time later.
- 2
Step 2
Mount the size 1 rear hook, start the white thread and lay a base back to the bend.
- 3
Step 3
Tie in a bunch of tan marabou at the bend for the tail, then bind the butts down and trim.
- 4
Step 4
Tie in the Ice Dub brush in front of the tail and wrap it up the shank, stroking the fibers back after each turn. Tie it off at the eye, whip finish and add a drop of glue.
- 5
Step 5
Link a 15mm fish spine shank to the eye of the rear hook so the two pieces hinge. Leave the rear hook in the vise.
- 6
Step 6
Start the thread on the shank, then wrap a section of the Ice Dub brush along it, stroking the fibers back. Tie it off, whip finish and add a drop of glue.
- 7
Step 7
Mount the 1/0 front hook and start the thread. Run the wire through the eye of the fish spine shank and slide a red articulation bead onto it.
- 8
Step 8
Bind the wire along the front shank and check that the rear sections swing freely.
- 9
Step 9
Wrap more of the Ice Dub brush over the rear part of the front shank, stroking the fibers back.
- 10
Step 10
Thread two gold beads onto a short length of wire and tie them on near the front of the hook, just ahead of the Ice Dub brush, where the collar brush will cover them.
- 11
Step 11
Tie in the second brush with the craft fur and Predator Wrap. Wrap it forward to the eye, pulling the fibers back after each turn so they stay free, then tie it off and whip finish.
- 12
Step 12
Sweep the collar back over the body and comb it into a slim baitfish shape, trimming any stray fibers.
- 13
Step 13
Color the top of the head with the black and Delta Brown markers and the throat with a red marker.
- 14
Step 14
Work a little Tear Mender through the head fibers to set the shape, then press an eye into place on each side.
- 15
Step 15
Coat the head with UV clear fly finish and cure it.
Watch Tying Tutorial
https://www.youtube.com/watch?v=Km2Q0z64oTo
Credit: Cheech / Fly Fish Food