 Fly Tying Inventory
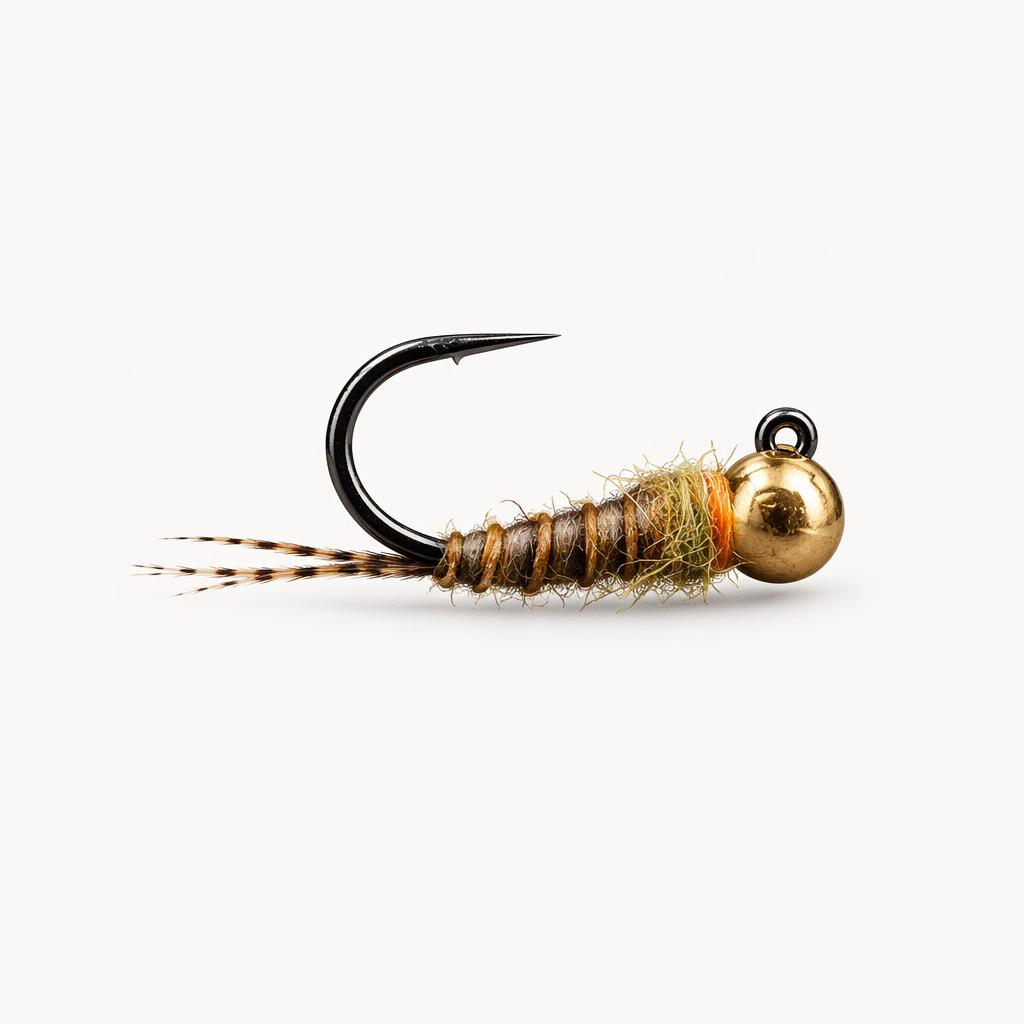
TRC Baetis
TRC Baetis is a jig nymph tied by Cheech that shows a different way to use biots. A strand of flexible floss wrapped through a turkey biot body brings UV properties to the biot and makes it more durable. A Coq de Leon tail, a gold tungsten bead, fluorescent orange thread and a light olive UV dubbing thorax round it out. There are plenty of color combinations to try, but biots generally limit the body to about a size 14 or 12. Tied here on a size 16 hook.
Ready to tie this?
This pattern needs 7 materials. Sign up free to check which ones you already own.
Materials
Fulling Mill 5045 Jig Force Barbless hook, size 16 (or Hanak H 400 BL Jig Hook)
16
Semperfli Classic Waxed Thread 12/0, fl. orange (or Danville Flat Waxed Nylon 70 Denier, fl. orange)
Fl. Orange · 12/0
Hanak Round+ Slotted Tungsten Beads, gold, 3.0mm (or Fulling Mill Slotted Tungsten Beads, gold, 2.8mm)
Gold · 3.0mm
Spanish Coq De Leon - Pardo (or Hareline Coq De Leon, medium speckled pardo)
Fulling Mill Turkey Biots, brown olive (or Turkey Biot Quills, BWO)
Brown Olive
Fulling Mill Micro Flex-Floss, fl. apricot (or fl. peach)
Fl. Apricot
Fulling Mill Euro Nymph Flash Dub, light olive UV (or brown olive UV)
Light Olive UV
How to Tie the TRC Baetis
- 1
Step 1
Slide the gold bead onto the jig hook and mount the hook in the vise.
- 2
Step 2
Start the orange thread behind the bead and wrap a smooth base back to the bend.
- 3
Step 3
Tie in a small bunch of Coq de Leon fibers at the bend for the tail. Trim the butts and cover them with thread.
- 4
Step 4
Pull a single turkey biot from the stem and tie it in by the tip at the bend.
- 5
Step 5
Tie in a strand of Micro Flex-Floss at the same point and let it trail behind the fly.
- 6
Step 6
Bring the thread forward to the front of the abdomen, leaving space for the thorax behind the bead.
- 7
Step 7
Wrap the biot forward to form the body, gripping it with your fingers or hackle pliers. Tie it off and trim the waste.
- 8
Step 8
Wrap the floss forward through the biot body so it sits among the wraps. Tie it off and trim the waste.
The floss adds UV properties and makes the biot more durable.
- 9
Step 9
Dub a thin strand of Euro Nymph Flash Dub onto the thread.
- 10
Step 10
Wrap the dubbing to form a small thorax up to the bead.
- 11
Step 11
Whip finish behind the bead and cut the thread.
Watch Tying Tutorial
https://www.youtube.com/watch?v=BaIFAa-3UAg
Credit: Cheech / Fly Fish Food