 Fly Tying Inventory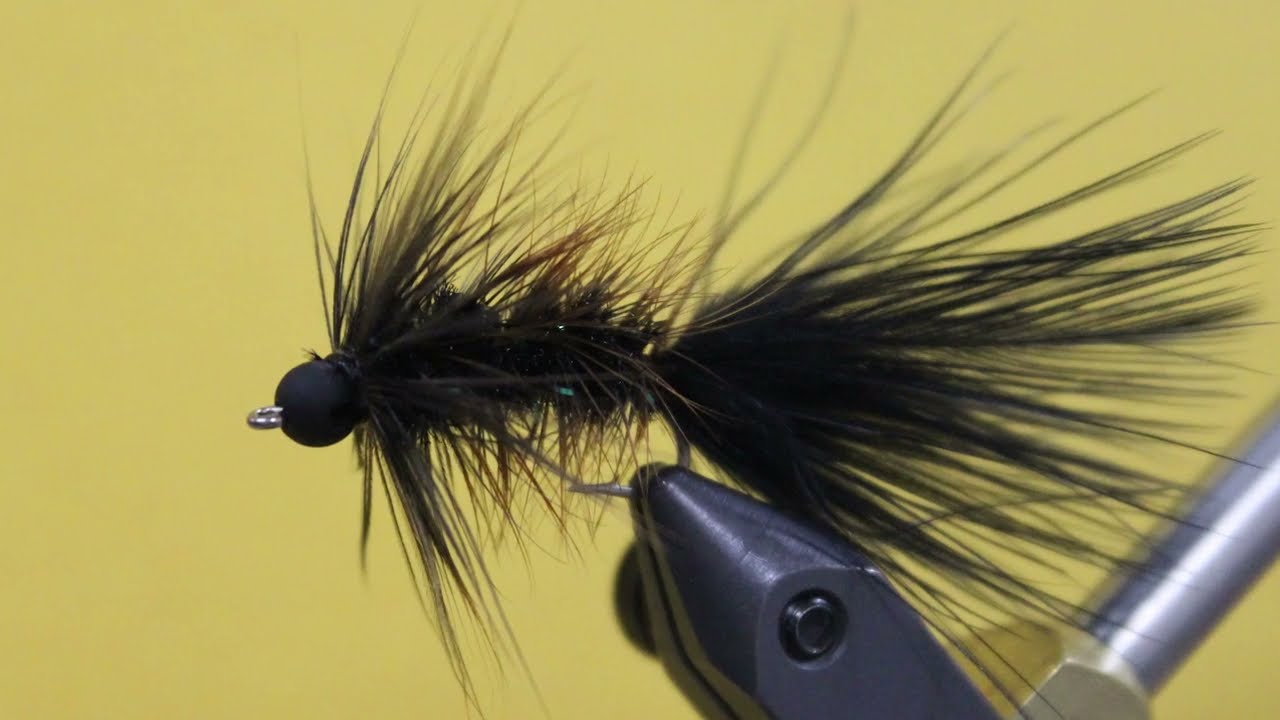
Woolly Bugger - Black
The most versatile fly pattern ever created. Imitates leeches, baitfish, crayfish, and large nymphs. A must-have in every fly box.
🪶 Ready to tie this?
This pattern needs 8 materials. Sign up free to check which ones you already own.
Materials
Streamer 3XL hook, size 6-12
Brass or tungsten bead 3.3mm, black or gold
Black 6/0 or 140 denier
Black marabou, one full plume
Black chenille, medium
Copper or gold wire, medium
Black rooster saddle hackle, palmered
How to Tie the Woolly Bugger - Black
- 1
Step 1
Secure the hook in the vise and slide on the bead if using one. Start thread behind the bead and wrap a smooth thread base back to the bend of the hook.
- 2
Step 2
If adding weight, wrap 15-20 turns of lead wire along the middle of the shank. Secure with thread wraps and build small thread ramps on either side for a smooth transition.
- 3
Step 3
At the bend of the hook, tie in a marabou plume for the tail. The tail should be approximately one hook-shank length. Pinch and align the fibers before tying in.
Strip the fluffy base fibers from the marabou before tying in for a cleaner tie-in point and better action in the water.
- 4
Step 4
At the same tie-in point, tie in a piece of medium copper or gold wire for the rib. Let it hang to the rear.
- 5
Step 5
Also at the tail tie-in point, tie in a piece of medium black chenille. Let it hang to the rear.
- 6
Step 6
Select a black saddle hackle feather. Strip the fluffy base fibers and tie it in by the stem at the base of the tail, with the dull side facing you.
- 7
Step 7
Wrap the chenille forward in touching turns to just behind the bead or eye. Tie off and trim the excess chenille.
- 8
Step 8
Palmer the saddle hackle forward through the chenille body in evenly spaced spiral wraps (5-7 turns). Tie off behind the bead/eye and trim the excess.
Stroke the hackle fibers rearward with each wrap to prevent trapping them under subsequent wraps.
- 9
Step 9
Counter-wrap the wire rib forward through the hackle in the opposite direction to reinforce it. This also creates a nice segmented look. Tie off and helicopter the wire to break it.
- 10
Step 10
Build a neat thread head, whip finish, and apply a drop of head cement or UV resin.
Watch Tying Tutorial
https://www.youtube.com/watch?v=xyUFOg5_RHs
Credit: Russell Blessing (1967)